Sous-vide can make it remarkably easy to cook a steak to the temperature you want. But a perfectly pink center does not automatically make a great dinner. The meat can still taste dry, the surface can look pale, and the crust can be disappointingly timid.
Most introductory guides spare the home cook these complications. And perhaps they are right: even a fairly casual attempt at sous-vide can improve someone’s cooking. But if you are not satisfied with pretty good, the details matter.
The biggest improvements come from understanding four problems: pale food, a weak sear, texture damaged by excessive cooking, and a schedule that does not work on a weekday. None requires an expensive vacuum sealer or a blowtorch. One of the most useful tools is simply your refrigerator.
Table of Contents
- Key Takeaways
- What Sous-Vide Actually Does
- The Equipment: A Circulator, a Container, and Good Bags
- How to Bag Food Properly for Sous-Vide
- Sous-Vide Temperatures and Cooking Times
- Yes, You Can Overcook Food Sous-Vide
- The Secret to a Better Sous-Vide Sear: Cool the Surface
- How to Make Sous-Vide Work on a Weekday
- Sous-Vide vs. Reverse Sear
- Precision Is the Beginning, Not the Finish
Key Takeaways
- Precise temperature control does not prevent texture from deteriorating during excessively long cooking.
- Drying and briefly chilling cooked meat gives you more time to build a browned crust.
- Chill skin-on chicken and duck completely before the longer sear needed for crisp skin.
- Cook-ahead preparation suits tender meats, while delicate seafood is best cooked only once.
What Sous-Vide Actually Does
Sous-vide means “under vacuum” in French, but the most important part of the method is not the vacuum. It is precise temperature control.
If you want the center of a piece of meat to approach 130°F, you put it in a water bath held at 130°F. An immersion circulator heats and moves the water, maintaining the temperature you set. The food goes into a bag, the bag goes into the bath, and, after enough time, the food approaches the bath’s temperature.
For many tender cuts, the basic sequence is simple:
- Heat the water bath to the desired cooking temperature.
- Season and bag the food.
- Cook for the appropriate time, taking thickness into account.
- Dry and, when appropriate, cool the surface before searing.
- Sear and serve.
This removes one of the biggest challenges in cooking proteins: catching the exact moment when the center is done. It does not remove the need to think about texture, browning, or food safety.
The Equipment: A Circulator, a Container, and Good Bags
When I first became interested in sous-vide, immersion circulators cost more than $1,000 and were largely out of reach for home cooks. Some adventurous people brought home retired laboratory equipment. Others rewired slow cookers into temperature-controlled water baths.
I had neither the electrical engineering skills nor the courage to cook in old lab equipment. Instead, I babysat a large pot of water on the stove with a thermometer. Eventually, I switched to Kenji López-Alt’s insulated beer cooler method, which uses a cooler’s insulation to keep hot water warm for a while.
Early home appliances such as the SousVide Supreme made the technique more accessible, though they were bulky and expensive. Competition eventually gave us the smaller immersion circulators available today. I use an Anova immersion circulator, but there are plenty of brands to choose from.
Choose a container that makes setup easy
If you cook sous-vide occasionally, a large pot is perfectly reasonable. If you use it regularly, I strongly prefer a dedicated plastic container.
My 12-quart Lipavi container fits neatly inside my sink. I can fill and empty it without carrying a heavy container of water across the kitchen, and it holds at least eight portions. That is useful for both dinner parties and cooking ahead.
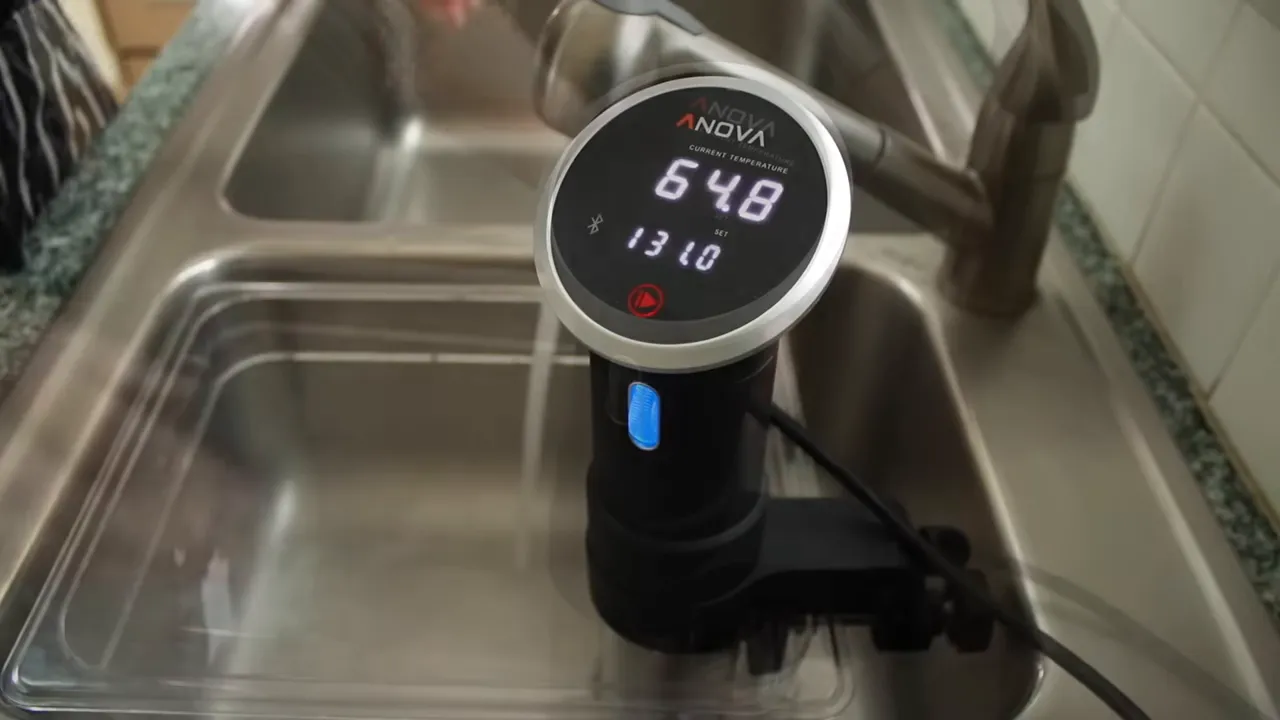
I start with hot water to reduce the time needed to bring the bath to temperature. Set the circulator, start it, and wait until the water reaches the target before adding the food.
You do not need a vacuum sealer
Restaurants often use chamber vacuum sealers. They are expensive, and they are not necessary for this approach.
For these preparations, I prefer sturdy zipper freezer bags to the common suction-style home vacuum sealers. Strong suction can distort delicate food, and liquids such as oil make those machines less convenient. A freezer bag and water displacement do the job nicely.
Use sturdy freezer bags, not flimsy sandwich bags. Choose bags suitable for the cooking temperatures you plan to use.
How to Bag Food Properly for Sous-Vide
Packaging is not just about keeping water away from dinner. It affects the food’s shape, whether pieces stick together, and how evenly they heat.
- Fold the top of the bag outward. This keeps the zipper clean while you load the food.
- Season the protein with salt. Then place it in the bag.
- Arrange multiple pieces side by side. Position them so they remain in a single layer as you lower the bag into the water, rather than tumbling into a stack.
- Leave the zipper fully open while lowering the bag. Water pressure pushes air out more effectively this way than through one tiny opening in an otherwise closed zipper.
- Lower the bag until the water reaches just below the zipper. Keep the opening above the water, then seal it. A utensil can help push the food down if the bath is too hot for your hands.
- Check for trapped air. If the food-filled portion floats, reopen the bag and repeat the displacement process.
- Clip the bag to the container. Keep the food submerged and positioned so water can circulate around it, rather than leaving the bag flat against the bottom.
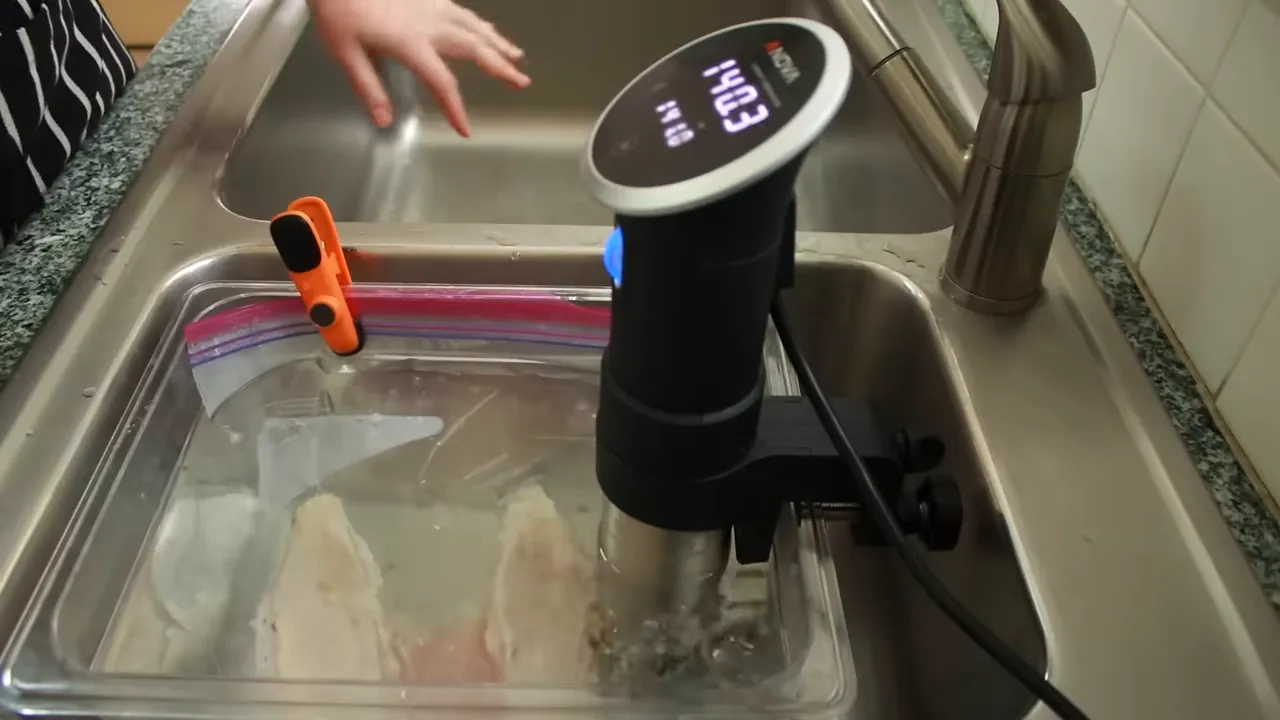
Why I add oil to fish and shrimp
For fish and shrimp, I find that a generous amount of oil helps prevent pieces from sticking together. It also helps preserve a more attractive shape and surface.
I use neutral oil so it does not interfere with the seafood’s flavor. Since the oil will be discarded, there is no reason to use anything expensive. This is a technique for delicate seafood, not a requirement to fill every bag of meat with oil.
Sous-Vide Temperatures and Cooking Times
These are the temperatures I like for texture. They are starting points for personal preference, not a claim that everyone should enjoy salmon or steak exactly as I do.
Important safety distinction: a preferred texture temperature and a cooking time are not automatically a validated pasteurization schedule. Safety depends on the food, its thickness, temperature, and time. This is especially important for low-temperature poultry and for anything you plan to chill and store. Douglas Baldwin’s practical sous-vide guide provides detailed guidance on heating, pasteurization, cooling, and storage.
My preferred water-bath temperatures
- Salmon: 124°F (51°C).
- Tender cuts of beef, lamb, pork, and veal; duck breasts; and fish other than salmon: 131°F (55°C).
- Tender cuts of highly marbled prime beef: 135°F (57°C), my preference for handling the extra marbling.
- Chicken breasts and shrimp: 141°F (61°C).
- Eggs: 146°F (63°C).
Cooking times by thickness
For tender cuts of beef, lamb, pork, and veal, as well as duck breasts and chicken breasts, my basic texture guidelines are:
- Less than 1.5 inches (3.8 cm) thick: about 1 hour.
- 1.5 to 2 inches (3.8 to 5 cm) thick: about 2 hours.
For fish fillets and shrimp:
- Up to 1 inch (2.5 cm) thick: about 20 minutes.
- Over 1 inch and up to 1.5 inches (3.8 cm) thick: about 25 minutes.
For eggs at my preferred temperature, I use 45 minutes.
Thickness is the useful measurement here. A thicker piece takes longer to heat through, even if its weight is similar to that of a thinner, wider piece.
Yes, You Can Overcook Food Sous-Vide
The claim that you cannot overcook with sous-vide is very appealing. Unfortunately, it is not true.
A controlled bath prevents the food from getting hotter than the water. It does not stop the changes that occur while food remains at that temperature. Longer cooking can mean more tenderness but less juiciness. Take it far enough, and a tender steak can become both mushy and dry.
The idea of treating sous-vide like a slow cooker helped make the appliance sound familiar: put a steak in before work, come home, sear it, and dinner is ready. The problem is that a tender steak does not necessarily benefit from spending the whole workday in hot water.
There is an important difference between a forgiving cooking window and an unlimited one.
Meat and poultry are more forgiving than seafood and eggs
For the tender meat and poultry preparations discussed here, an extra hour or two often makes little noticeable difference in texture. That flexibility is one of the method’s great advantages.
Fish, shrimp, and eggs are much less forgiving. I try to limit holding them after their intended cooking time to roughly 10 minutes. After that, texture gradually suffers:
- Shrimp become mushy.
- Fish become dry.
- Egg yolks become firmer.
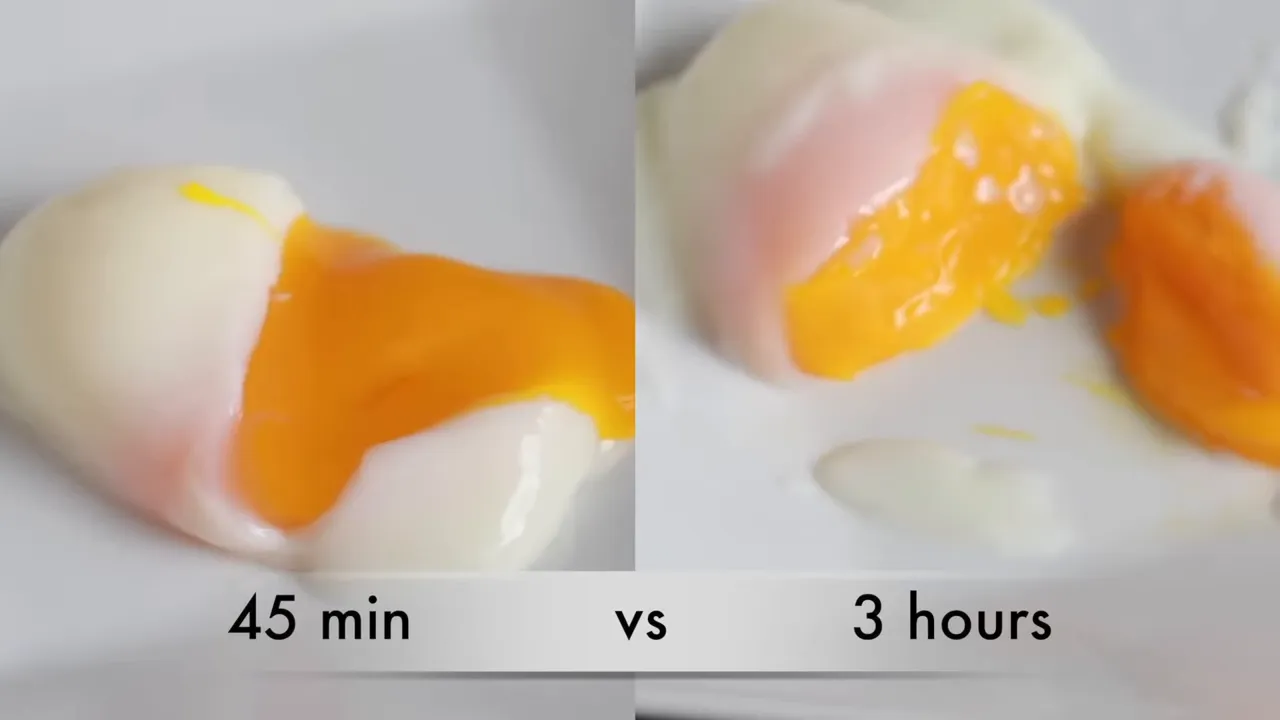
The bath gives you control over temperature. You still need to control time.
The Secret to a Better Sous-Vide Sear: Cool the Surface
A pale piece of meat straight from the bag is not my idea of dinner. I want browning, flavor, and a proper crust.
The usual suggestions are an extremely hot skillet or a blowtorch. Personally, I do not enjoy the flavor a torch can give the meat. And overheating a skillet until the fire alarm contributes to dinner is not a complete solution either.
The problem is that sous-vide meat tends to release moisture as it sears, even after you have dried it. Meanwhile, the center is already at your desired temperature. Every additional minute in the skillet risks undoing the precision you worked to achieve.
The solution is wonderfully unglamorous: cool the outside before searing.
For steaks and pork chops
- Remove the cooked meat from the bag.
- Dry it thoroughly with a couple of layers of paper towels.
- Refrigerate it for about 10 minutes.
- If the cut is thick enough, stand it on its edge so both broad surfaces can dry.
- Sear it in a hot skillet.
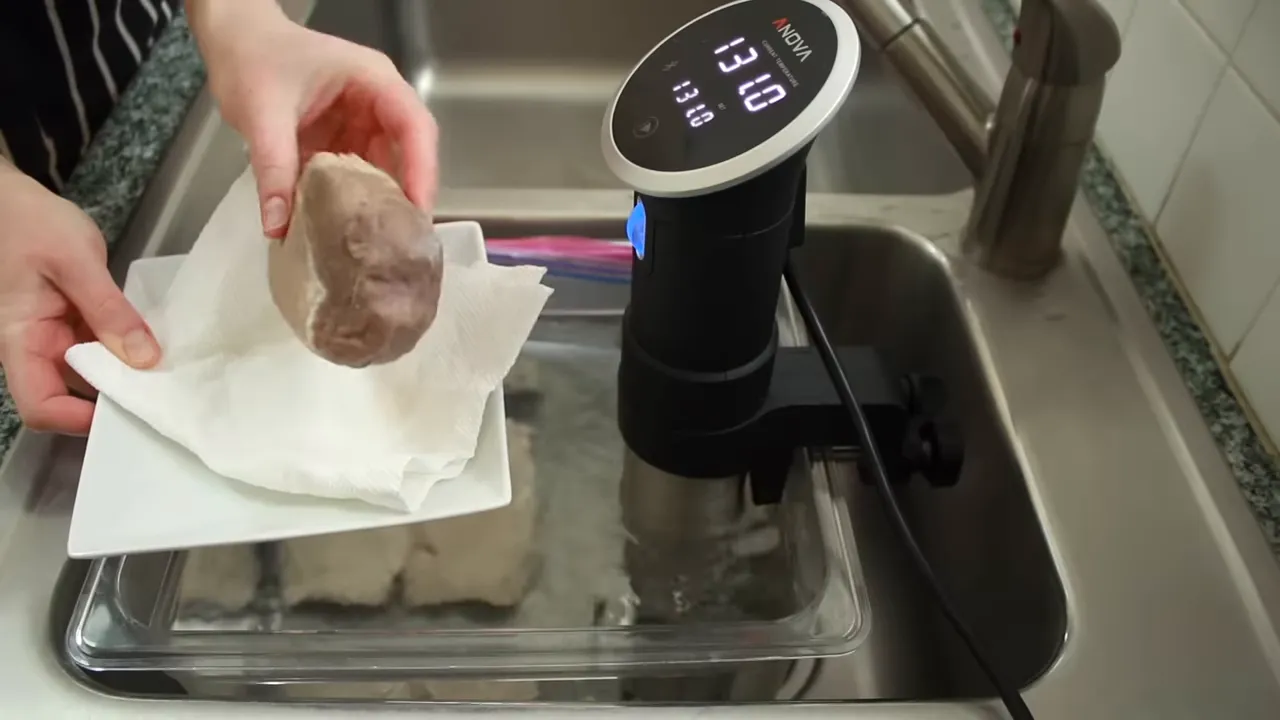
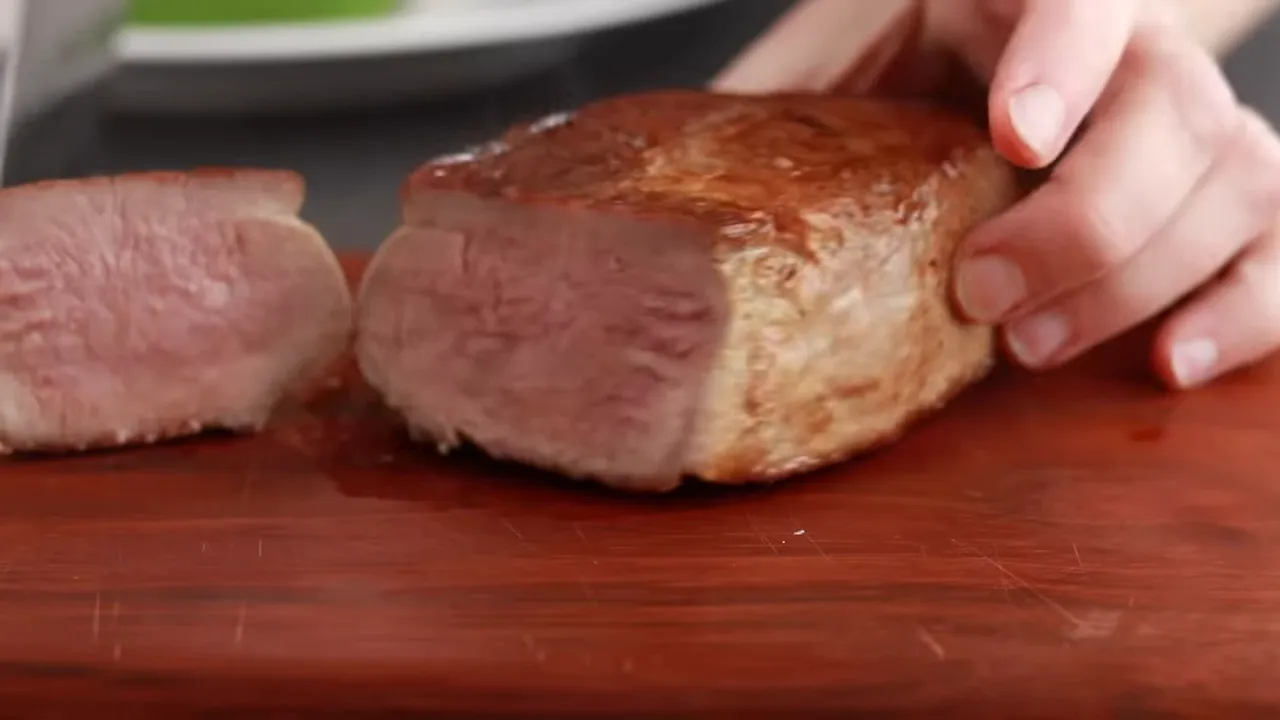
Cooling the surface gives you more time to develop a crust before the center heats too far. Instead of trying to do everything in one minute per side, you may have roughly two minutes per side. That extra time makes a substantial difference.
If you are in a hurry, put the sealed bag into an ice-water bath for about two minutes instead. This cools the outside quickly, but it does not dry the surface as effectively as the refrigerator. Remove the meat and dry it thoroughly afterward.
This brief ice bath is a surface-cooling step for immediate searing. It is not the same as fully chilling food for storage.
For skin-on chicken and duck, chill completely
Chicken and duck skin need more time than a steak’s surface. Really crisp skin can take about 7 to 10 minutes in the skillet. Even two minutes is not enough.
If you start with warm poultry, you can easily end up choosing between great meat and great skin. Chilling it completely first gives you a way to get both.
During searing, spend almost all the time, roughly 95 percent, on the skin side. The skin acts as insulation, protecting the meat while it gradually warms. The extended skin-side cooking develops crispness without treating the entire breast as though it needs to be cooked from raw again.
This is also why skin-on chicken and duck breasts are such useful make-ahead options.
How to Make Sous-Vide Work on a Weekday
Waiting more than an hour for dinner is not always practical. The answer is not to leave everything cooking all day. It is to separate the initial cooking from the final warming and searing.
Cook tender meat ahead, then warm it briefly
For steaks and pork chops, choose cuts less than 1.5 inches thick if you want to use the shorter cooking schedule.
- Cook ahead: use the appropriate temperature and cooking schedule when you have time.
- Chill and store safely: if the food is intended for later meals, follow a validated cook-chill procedure, including adequate pasteurization, rapid chilling, and refrigerated storage.
- Warm before dinner: my weekday approach for these thinner, previously cooked cuts is about 30 minutes back in the water bath.
- Finish: dry, briefly cool the surface as needed, and sear.
Why is the second bath shorter? Heating has two jobs: changing the food’s texture and making it pleasantly warm to eat. The initial cooking has already done the texture work. Rewarming does not require the same precision to produce a pleasant serving temperature.
For example, a previously cooked steak warmed to 115°F instead of its original 130°F target can still be pleasant to eat after searing. That is a serving-temperature observation, not a substitute for safe cooking and storage.
Skin-on chicken and duck can go straight to the skillet
Because I prefer to chill these completely before crisping the skin anyway, they fit naturally into advance preparation. Properly cooked, chilled, and stored breasts can go from the refrigerator into the skillet for the skin-crisping stage.
That puts the protein portion of dinner in the neighborhood of 10 minutes, rather than requiring a full water-bath session after work.
Cook seafood only once
I do not recommend cooking fish and shrimp ahead and then putting them through another heating cycle. Their texture is too delicate, and they cook in only about 20 to 25 minutes in the first place.
You can save some preparation time by seasoning and bagging them ahead, provided you stay within safe refrigerated storage limits. Do not assume raw seafood can sit in the refrigerator for an entire week simply because it is sealed in a bag.
For seafood, the most useful weekday shortcut is having the preparation done, not having the cooking done twice.
Sous-Vide vs. Reverse Sear
The reverse-sear method follows a similar broad idea: cook gently first, then brown the outside. The main difference is that it uses an oven rather than a temperature-controlled water bath.
Both methods have advantages. Sous-vide is particularly useful when dinner does not run on a perfectly predictable schedule.
- More scheduling flexibility: if the side dishes are late or the guests are delayed, tender meat can generally wait in the bath within its reasonable holding window.
- Less dependence on thermometer placement: you do not have to locate the exact center repeatedly to catch the lowest internal temperature.
- Easier handling of modest thickness differences: a 1-inch steak and a 1.25-inch steak can share a bath and finish together, allowing enough time for the thicker one.
- Convenience for multiple portions: cooking several steaks does not require tracking a separate finishing moment for every piece.
The disadvantages are that sous-vide takes longer and requires special equipment. Reverse searing avoids the water-bath setup, and its surface-drying effect makes browning easier.
I used to find the sear after sous-vide noticeably less satisfying than the sear after oven cooking. Cooling and drying the meat before it reaches the skillet solved that problem for me.
Precision Is the Beginning, Not the Finish
Sous-vide solves the problem of temperature control beautifully. To turn that precision into a delicious meal, give the other details the same attention: arrange the food properly, remove trapped air, respect cooking time, and prepare the surface for browning.
Most importantly, do not assume that a longer bath is always better or that a hotter skillet can solve every searing problem. Sometimes the best way to improve dinner is to stop heating it for a few minutes.


