I have reverse seared steaks, racks of lamb, pork chops, even burgers. But can you reverse sear a whole chicken? You can, and the result is about as close as I can get to a glorious French rotisserie chicken at home.
The trick is not simply to cook a chicken slowly and blast it with heat at the end. A whole bird presents a few problems that a steak does not. The breast and legs need different final temperatures, and a round chicken is not exactly suited to searing in a skillet. Besides, I want roast chicken, not skillet-seared chicken.
Four adjustments make it work: salt ahead, roast breast side down, use a browning glaze, and give vegetables a head start when they need one.
What You'll Learn
- Salt under the breast skin a day ahead to improve moisture retention and tenderness.
- Roast breast side down over vegetables to help the legs cook faster than the breast.
- A thin browning glaze and a brief broil develop color without a prolonged high-temperature roast.
- Give cabbage and other sturdier vegetables a hot head start before adding the chicken.
Why Reverse Searing Works for Roast Chicken
High heat is wonderful for browning. It is less wonderful for the texture of a thick piece of meat. By the time the center cooks through, the outer layers can become tough and dry.
Reverse searing separates those jobs. First, gentle oven heat brings the meat toward its target temperature. Then a short burst of intense heat develops the browned exterior without subjecting the whole piece to a long, hot roast.
With chicken, there is another complication: the legs are best around 180°F (82°C), while I aim for breast meat around 150°F (66°C), with sufficient holding time for safety. Separating the bird would make those temperatures easier to control, but it would also mean giving up the pleasure of serving a whole roast chicken.
Fortunately, changing the bird’s orientation does much of that work for us. The same principles can also be adapted to turkey, although the timing will differ. For that larger project, Brian Lagerstrom has a useful turkey adaptation.
1. Salt Ahead and Under the Breast Skin
Chicken breast needs all the help it can get with staying moist. I strongly recommend salting the chicken a day before cooking, especially directly under the breast skin, where the salt can reach the meat.
Salting ahead reduces how much the muscle proteins contract during cooking. The result is breast meat that stays more tender and juicy.
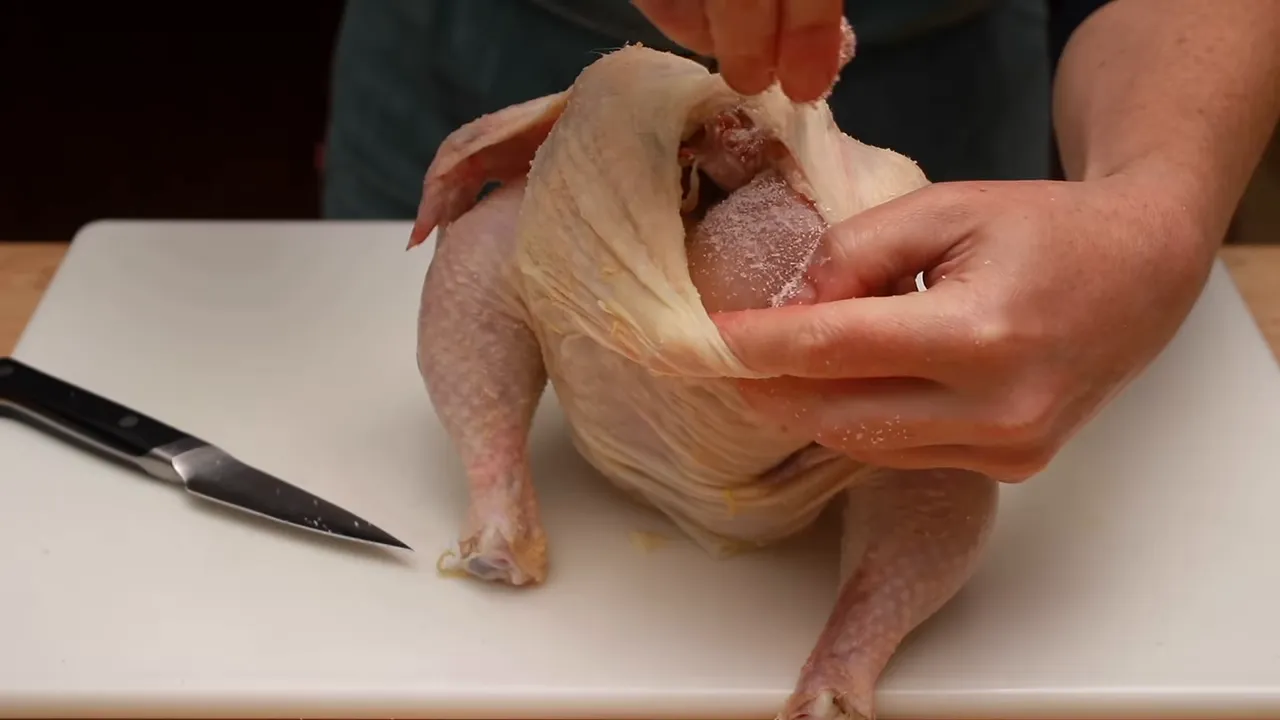
Once salted, put the chicken on a rack set over a plate and refrigerate it uncovered overnight. This gives you a second benefit: the skin dries, making browning easier the next day.
If you are pressed for time, you can salt just before cooking. The gentle roasting method is forgiving enough to make that workable. But when I have the choice, I salt ahead.
2. Roast the Chicken Upside Down
The classic roast chicken question is, “How do I get the legs done without overcooking the breast?” My solution is very simple: roast the bird breast side down.
This exposes the legs to more radiant oven heat while sheltering the breast underneath. I set the chicken on a rack over a pan of vegetables, rather than placing it directly on the vegetables.
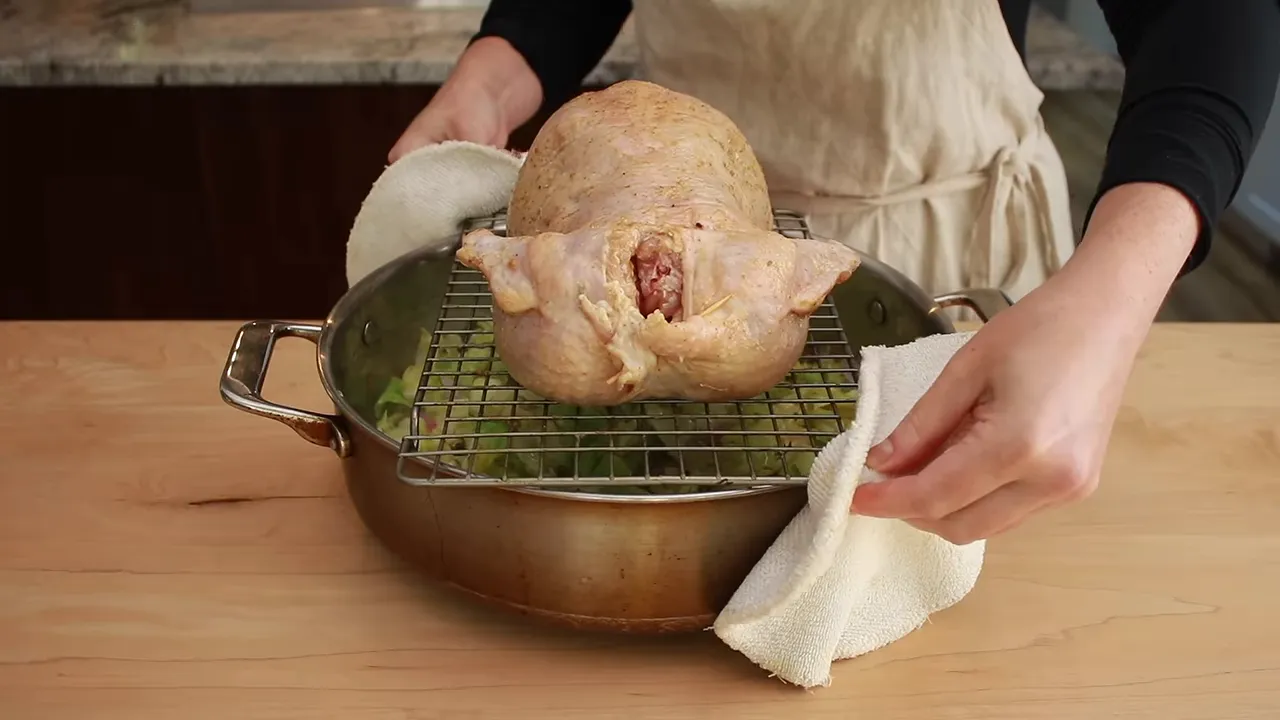
The vegetables release moisture, creating a little steam beneath the bird and slowing the cooking of the breast. They also become a built-in side dish. A technique that improves the chicken and takes care of the vegetables is a technique worth keeping.
3. Use a Glaze to Brown at a Gentle Temperature
For a reverse-seared steak, the low-temperature oven stage has one job: raise the internal temperature. We are not trying to brown it yet.
For a whole chicken, I want that oven stage to do two jobs: cook the meat gently and brown most of the skin. So instead of the 250°F or 275°F often used for steak, I roast chicken at 300°F (150°C). The skin protects the meat, and this modest increase still gives us gentle cooking.
But 300°F alone does not give me the browning I want. That is where the glaze comes in. Soy sauce helps accelerate Maillard browning, and pomegranate molasses contributes sugars that caramelize. Together, they give the skin a tremendous head start.
Surprisingly, the result does not taste overtly of soy sauce or pomegranate. Applied in a thin layer, the glaze makes the chicken taste like beautifully roasted chicken.
Browning Glaze Ingredients
- 1 garlic clove, finely grated on a Microplane
- 1 teaspoon soy sauce
- 1 teaspoon pomegranate molasses, or ½ teaspoon balsamic vinegar plus ½ teaspoon honey
- 1 teaspoon Dijon mustard
- 1 tablespoon neutral oil
- 2 teaspoons za’atar or dried oregano, optional
Mix the garlic, soy sauce, pomegranate molasses, and mustard in a small bowl. Slowly drizzle in the oil while whisking, then whisk in the optional herbs.
Alternatively, put everything in a squeeze bottle and shake well. If your za’atar contains sesame seeds, you may need to snip the bottle’s tip so they do not get stuck. Re-whisk or re-shake the glaze just before using it.
Coat the chicken lightly. You will not need all the glaze.
Finish the Breast Skin Under the Broiler
After roughly 75 to 90 minutes of roasting, the breast should reach about 145°F (63°C) in its coolest part, while the legs should be around 175°F (79°C). The exposed skin will have browned nicely. The breast skin underneath, however, will still be pale.
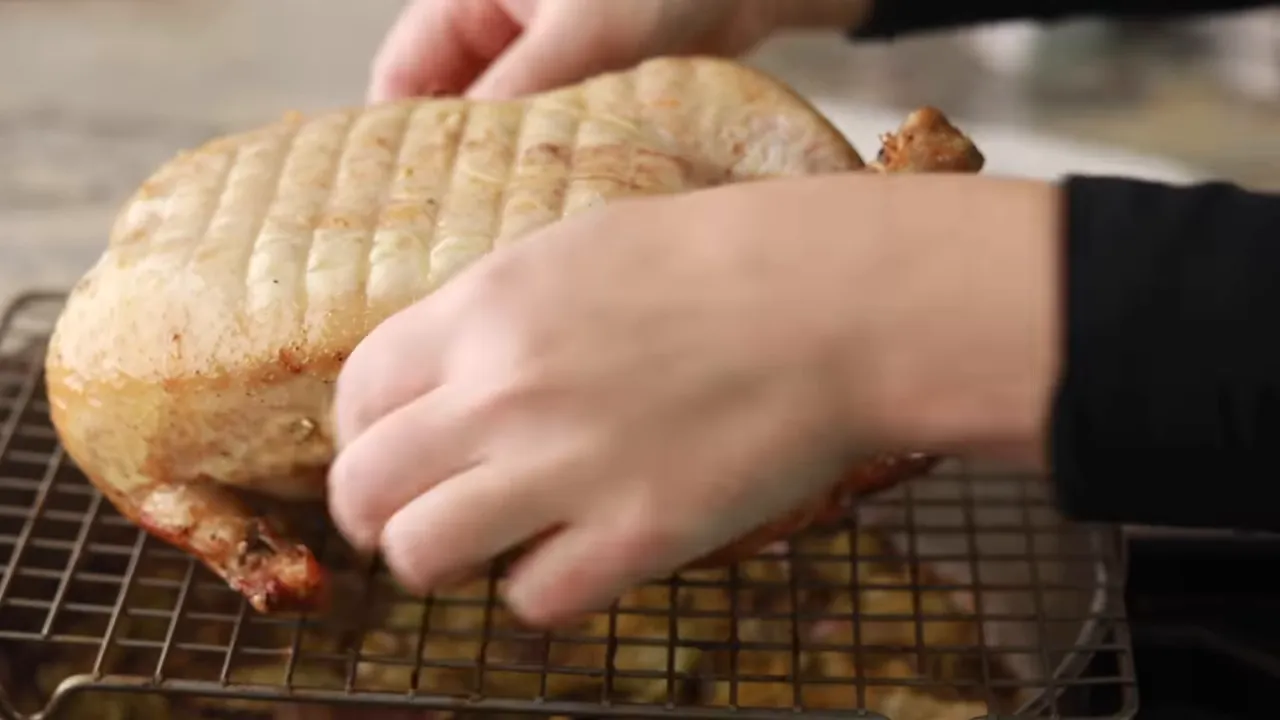
That is not a failure. It is simply the part we have saved for the final burst of heat.
Turn the chicken breast side up and broil for a few minutes, until the breast skin browns. At this point, I look for breast meat around 150°F and legs around 180°F. Then I rest the chicken for 10 minutes before carving.
A Note About Temperature and Food Safety
A 150°F breast temperature requires sufficient holding time. It is not an instant safety endpoint. The method relies on both temperature and time, including the rest after broiling. At 150°F, the necessary pathogen reduction takes several minutes, approximately three to four under appropriate conditions, rather than happening immediately.
Use an accurate thermometer and find the coolest part of the breast. The 145°F reading is only the endpoint for the initial roast, not the finished chicken. For the simpler consumer guideline that does not require calculating a holding time, FoodSafety.gov recommends 165°F for poultry.
I give this chicken a full 10-minute rest, which also makes carving more comfortable than handling a piping-hot bird.
4. Give Some Vegetables a Hotter Start
Tomatoes, onions, and garlic work well beneath a chicken at 300°F. They soften during the gentle roast, and you can brown them under the broiler while the chicken rests.
But what if you want cabbage or parsnips? The low-temperature roast alone does not soften and brown those vegetables the way I want. The solution is to give them a short, hot roast before adding the chicken.
- Heat the oven to 450°F (230°C), with convection on if available.
- Toss the vegetables with olive oil and salt in the pan you plan to use for the chicken.
- Roast for about 10 minutes, just until the vegetables begin to brown.
- Reduce the oven to 300°F (150°C) and turn off convection.
- Stir the vegetables, set the rack with the chicken over the pan, and continue with the gentle roast.
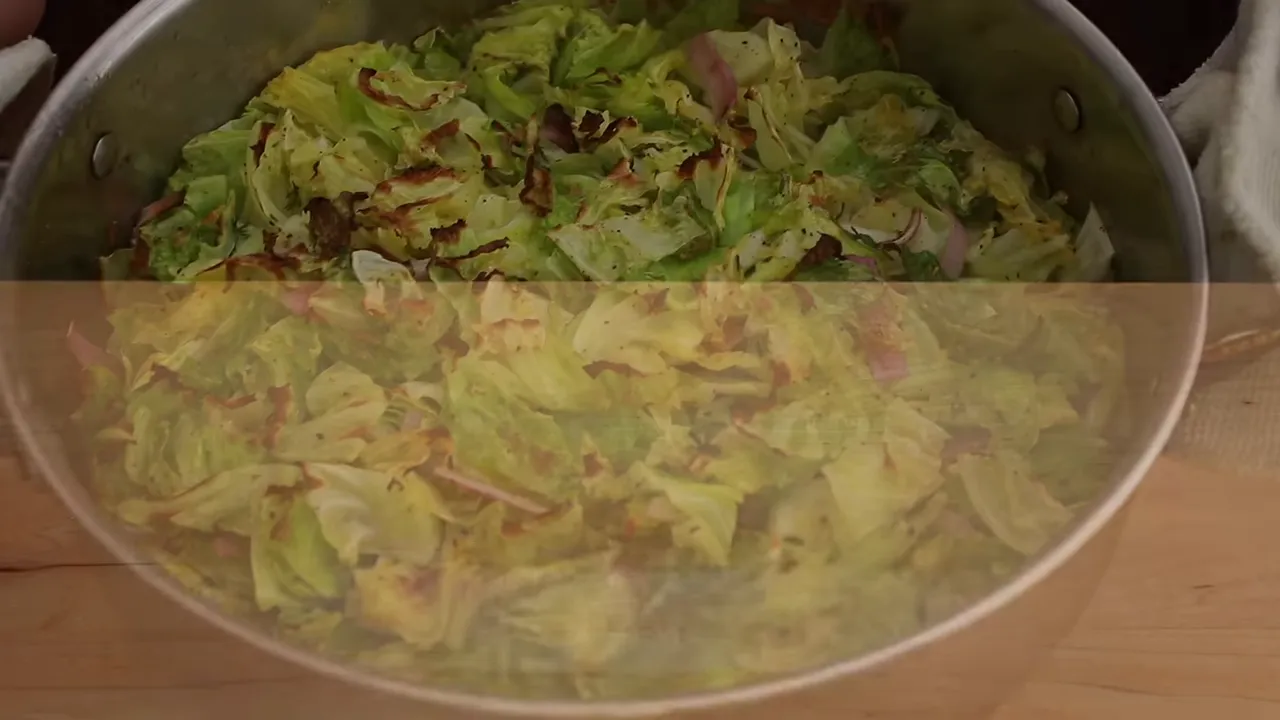
If the vegetables need more color when the chicken is finished, put them under the broiler during the chicken’s rest.
Reverse-Sear Roast Chicken with Tomatoes
Here is how the method comes together for a chicken weighing about 4 pounds, or just under 2 kilograms.
Ingredients
- 1 whole chicken, about 4 pounds
- About 16 grams salt, roughly 2 tablespoons Diamond Crystal kosher salt or 1 tablespoon table salt; weighing is preferable
- Browning glaze from the recipe above, as needed for a thin coating
- 1 pound Campari tomatoes, or other tomatoes
- 3 whole unpeeled garlic cloves
- 1 teaspoon dried oregano, optional
- 2 tablespoons butter, cut into 6 slices
- Balsamic vinegar or another source of acidity, to finish the tomatoes
Method
- Salt the day before. Season the chicken, getting salt under the breast skin. Refrigerate uncovered on a rack set over a plate overnight.
- Prepare the pan. Heat the oven to 300°F (150°C), without convection. Put the tomatoes, garlic, optional oregano, and butter into a large ovenproof skillet or roasting pan.
- Prepare the chicken. Pat the skin dry, tie the legs together with kitchen twine, and apply a thin layer of glaze. Set the chicken breast side down on a rack over the pan.
- Roast gently. Cook until the coolest part of the breast reaches 145°F (63°C), about 75 to 90 minutes. Rotate the pan halfway through. Treat the time as an estimate and the thermometer as your guide.
- Flip and broil. Carefully turn the bird breast side up and broil until the breast skin browns. Check for a breast temperature around 150°F (66°C) and legs around 180°F (82°C), following the holding-time guidance above.
- Rest the chicken. Move the rack with the chicken onto a plate and rest for 10 minutes before carving.
- Finish the tomatoes. While the chicken rests, broil the tomatoes for about a minute to brown them. Add a little balsamic vinegar or another acid to balance their richness, then serve with the chicken.
For more hands-on detail, I also have a full roast chicken tutorial.
Why Cooked Chicken Legs Can Still Look Pink
A little pink near the leg bones does not necessarily mean the chicken is undercooked. Pigment from bone marrow can color the surrounding meat even after the legs have reached their target temperature.
In this method, the legs finish around 180°F. At that temperature, their texture is tender enough to pull apart and practically shred, rather than being chewy or gristly. Judge doneness with a thermometer, not color alone.
That is the goal: tender legs, juicy breast meat, and deeply browned skin, all on a whole bird. We do not need a rotisserie. We just need to give each part of the chicken the heat it needs.
If you are in the Boston area and would like to cook with me in person, I teach classes at Helen’s Kitchen in Natick, Massachusetts.
|


