How do restaurants get quinoa to behave like perfect little pearls, while the same ingredient so often turns into mush at home? And how do chefs turn it into that delicious, crispy topping scattered over fancy salads and hamachi crudo?
There is no mysterious restaurant ingredient involved. The difference comes down to water, patience, and how you handle the quinoa after cooking. Use less water than many packages recommend, give it a proper rest, and resist the urge to stir it while it is still sticky.
Quinoa is technically a seed, not a grain, but we cook and serve it like one. With the right method, every seed can be tender, pleasantly toothsome, and separate. Once you have that, making crispy quinoa is simply another step.
What You'll Learn
- Wash quinoa consistently, then choose the cooking-water amount based on how much your pot evaporates.
- Rest cooked quinoa before gently fluffing, and stop if the seeds begin to clump.
- Cook quinoa ahead, then use it cold in salads or gently reheat it.
- Make crispy quinoa in a thin skillet layer with minimal oil, seasoning just before serving.
Table of Contents
- Wash the Quinoa, Even If It Is Prewashed
- The Right Quinoa-to-Water Ratio Depends on Your Pot
- How to Cook Quinoa Without Turning It to Mush
- Rest First, Then Fluff Gently
- Cook Quinoa Ahead for Salads and Warm Side Dishes
- How to Make Crispy Quinoa
- Season Crispy Quinoa Just Before Serving
Wash the Quinoa, Even If It Is Prewashed
Quinoa naturally has a coating of saponin, a bitter compound removed by washing. Many packages now contain prewashed quinoa and tell you that rinsing is unnecessary.
That sounds convenient, but it introduces a variable: washed quinoa has already absorbed some water. Dry quinoa and freshly rinsed quinoa do not need the same amount of cooking water.
My solution is simple: wash your quinoa, then use a method designed for washed quinoa. That gives you a consistent starting point.
- Measure 1½ cups dry quinoa into the pot or cooker insert you plan to use.
- Cover it generously with cold water. This is washing water, not the measured cooking water.
- Agitate the quinoa with your hand.
- Drain through a fine-mesh sieve.
- Repeat until the water no longer looks soapy.
- Drain thoroughly after the final rinse and return the quinoa to the pot.
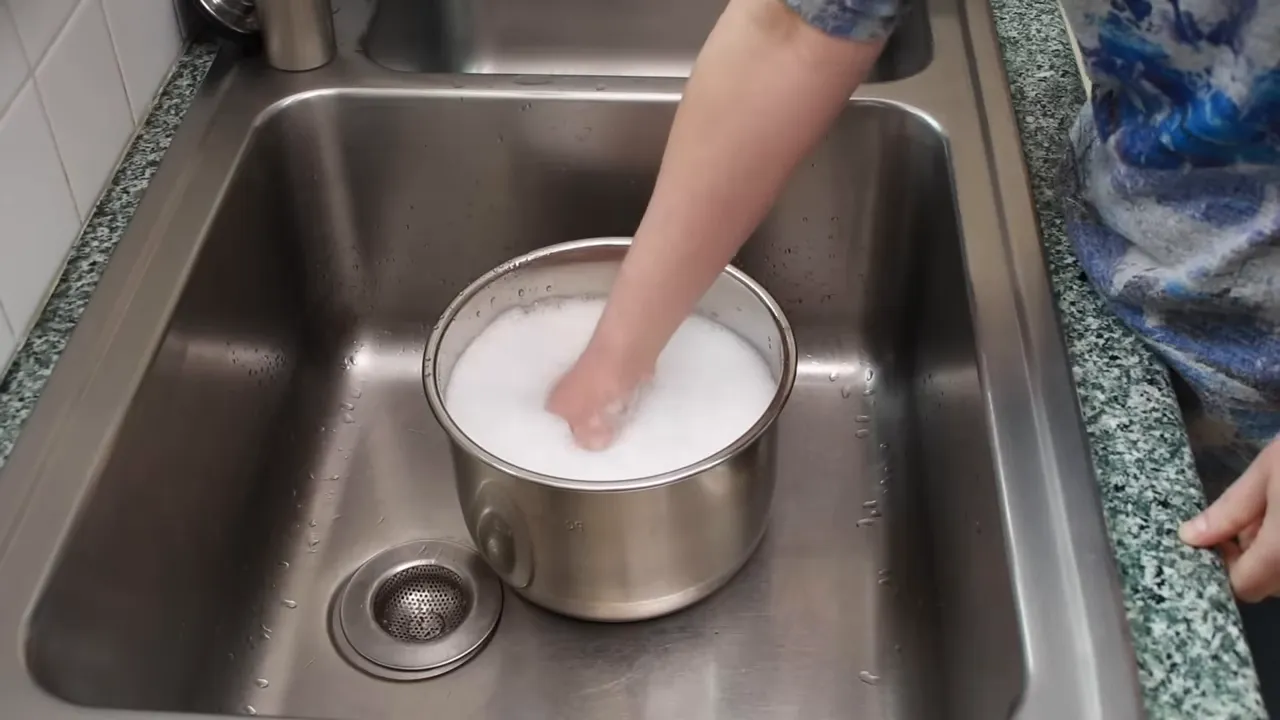
If your quinoa was not prewashed, the first round can look rather dramatic. Keep rinsing. If it was prewashed, you may have much less foam to remove.
The Right Quinoa-to-Water Ratio Depends on Your Pot
A package might suggest one cup of quinoa to two cups of water. In my experience, that is a very reliable way to get mush. For washed quinoa, start with considerably less water.
For a batch made with 1½ cups dry quinoa, measured before washing, use:
- Instant Pot or a well-sealed rice cooker: 1¾ cups water.
- Regular stovetop pot: 2 cups water.
Why the difference? Evaporation.
A cooker sealed with a rubber gasket loses very little water, so you need only a little more than an equal volume of water to quinoa. A regular pot loses some water while coming to a boil uncovered, then continues releasing steam around the lid during cooking.
Of course, not every pot and lid behaves identically. Treat these amounts as a good starting point. After the first batch, you can adjust the water slightly to suit your equipment.
How to Cook Quinoa Without Turning It to Mush
Ingredients
- 1½ cups dry quinoa, washed and thoroughly drained
- 1¾ cups water for an Instant Pot or well-sealed rice cooker, or 2 cups for a stovetop pot
- 2 teaspoons Diamond Crystal kosher salt, or 1 teaspoon table salt, adjusted to taste
Swirl the pot so all the quinoa is submerged, and push any seeds clinging to the sides down into the water. Add the salt. This is not baking, so there is room for judgment here. You can always adjust the seasoning later.
Instant Pot method
- Place the insert in the cooker and close the lid.
- Make sure the steam-release valve is set to sealing.
- Select the Rice program and turn off Keep Warm.
- Allow the cycle to run and the pressure to release naturally.
- Wait until approximately one hour after starting the program before opening, and confirm that the pressure has fully dropped.
That hour is not an hour of pressure cooking. It includes pressurizing, the rice cycle, natural pressure release, and resting.
For a well-sealed rice cooker, use the same water amount and its rice cycle, with Keep Warm turned off. The important idea is not to start stirring the moment cooking finishes.
Stovetop method
- Set the uncovered pot over high heat and bring to a boil.
- Reduce the heat to low and cover.
- Cook for 20 minutes. The heat should be just high enough for tiny wisps of steam to puff gently from under the lid.
- Remove the pot from the heat without uncovering it.
- Let it rest, covered, for at least 30 minutes before fluffing.
Rest First, Then Fluff Gently
What do you do when the cooking time is up?
You wait.
Stirring quinoa as soon as it finishes cooking is one of the easiest ways to turn it into a sticky mass. The cooking may be done, but the quinoa is not necessarily ready to be handled.
After its covered rest, take a fork and gently rake the top layer. Gradually work your way down rather than plunging in and vigorously mixing the whole pot.
At first, some seeds may feel softer and others firmer. That is normal; the texture will even out. What matters is how readily they separate.
- If the seeds separate easily: continue gently fluffing.
- If they start clumping: stop. More stirring will not help.
- If the quinoa is still sticky: cover it with a paper towel and let it cool for another 15 to 30 minutes, until barely warm, then try again.
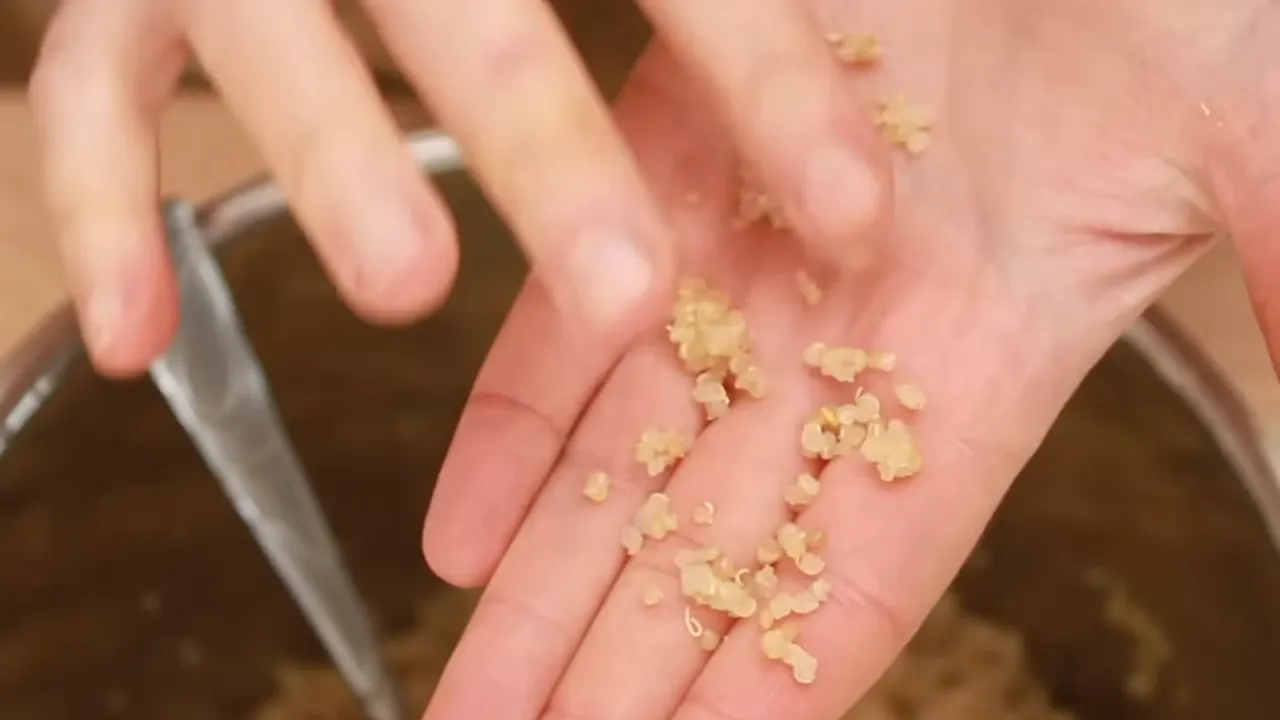
That last bit of cooling makes a real difference. You are looking for distinct seeds, not a fluffy-looking mound that is actually stuck together underneath.
Cook Quinoa Ahead for Salads and Warm Side Dishes
Quinoa is an excellent make-ahead ingredient. In fact, that is part of the restaurant advantage: the quinoa has generally been cooked and cooled before anyone orders it.
Plan on roughly an hour for washing, cooking, and resting, plus another 30 minutes if it needs extra cooling and fluffing. The active work is only about five minutes. Most of the job consists of leaving it alone.
I find that quinoa tastes even better the next day. Once cooled, store it in an airtight container in the refrigerator, or freeze it for longer storage. For food safety, follow the USDA guidance for leftovers: refrigerate promptly and use refrigerated leftovers within 3 to 4 days.
Use chilled quinoa directly in salads. For a warm, pilaf-style dish:
- Sauté onions in butter or oil.
- Add spices, dried fruit, nuts, and your cooked quinoa.
- Warm everything gently in a skillet over low to moderate heat.
- Finish with a splash of lemon juice and some butter.
You do not need to sacrifice good texture just because you want to serve quinoa hot. Cook it properly ahead of time, then warm it when needed.
How to Make Crispy Quinoa
Once your quinoa is cooked, cooled, and separated, you can turn it into a crunchy garnish.
I tested a baking sheet in the oven and a skillet on the stovetop, using everything from plenty of oil to none at all. The skillet won.
Why I prefer a skillet to the oven
A baking sheet lets you toast more quinoa at once, but I found it slower and less even, despite repeated stirring. Stirring on a baking sheet is also more awkward.
Since crispy quinoa is a topping, not usually something you need by the bowlful, a skillet makes more sense.
Use less oil than you think
This may be an unusual recommendation coming from me, but less oil works better here.
Deep-frying is a different technique. For skillet toasting, a generous amount of oil gave me quinoa that felt sticky and lodged in my teeth. No oil at all worked, but made it harder to keep every seed separate.
The sweet spot was just a tiny amount: enough to help separate the seeds, and no more.
Crispy quinoa ingredients
- 150 grams cooked, cooled, fluffed quinoa for a 12-inch skillet
- About 1 teaspoon olive oil, or another oil
Use a nonstick or cast-iron skillet, and add only enough quinoa to make a very thin layer.
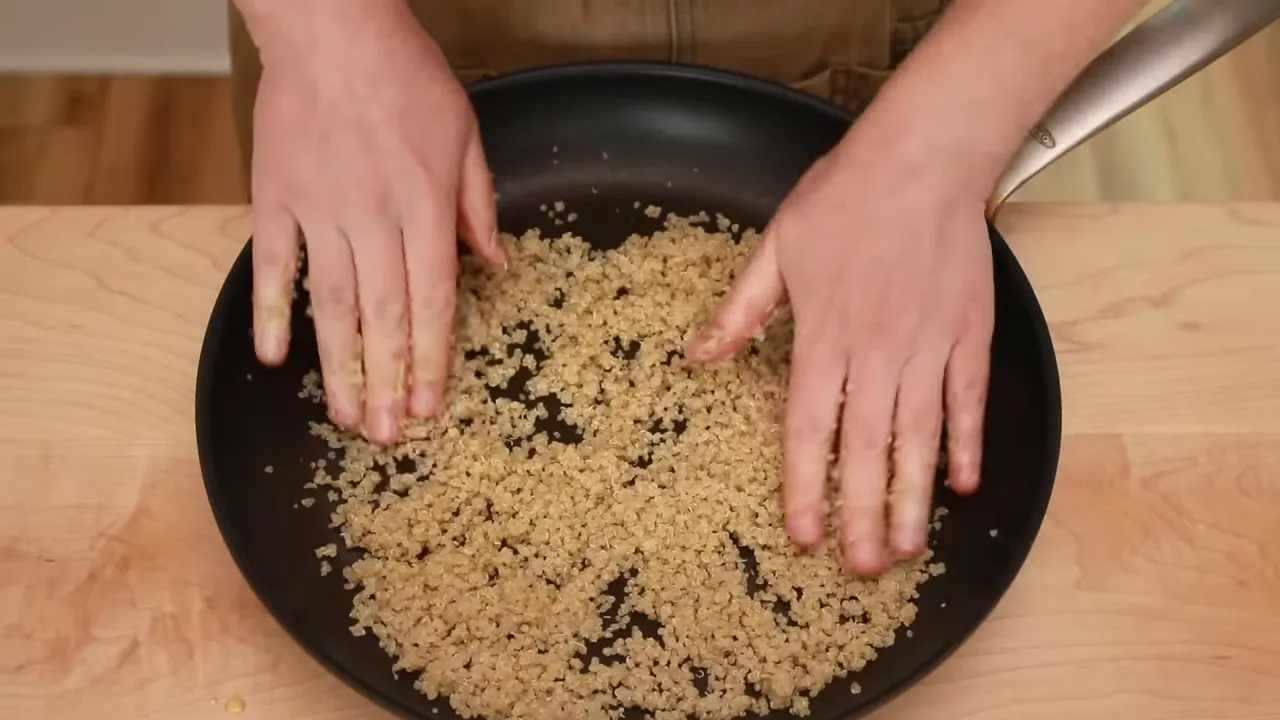
- Separate the seeds. Put the quinoa and oil in the unheated skillet. Gently rub the oil through the quinoa with your hands, breaking apart any clumps.
- Start gently. Set the skillet over medium-low heat and wait until the quinoa begins steaming. There is no need to stir before that.
- Dry before browning. Once you see steam, stir every minute or two, then spread the quinoa back into a thin layer. Break up any seeds that stick together.
- Control the heat. For about the first 10 minutes, you should see no color change. The quinoa needs to dehydrate before it browns.
- Toast until fully crisp. Browning should begin somewhere around the 10- to 20-minute mark. Continue stirring and spreading until the quinoa is completely dry, crisp, and a rich brown throughout.
- Cool on a plate. Transfer it out of the hot skillet and let it cool completely.
Do not crank up the heat to hurry things along. You will get uneven results: some seeds too hard, others still sticky. Slow drying followed by even browning gives you the texture you want.
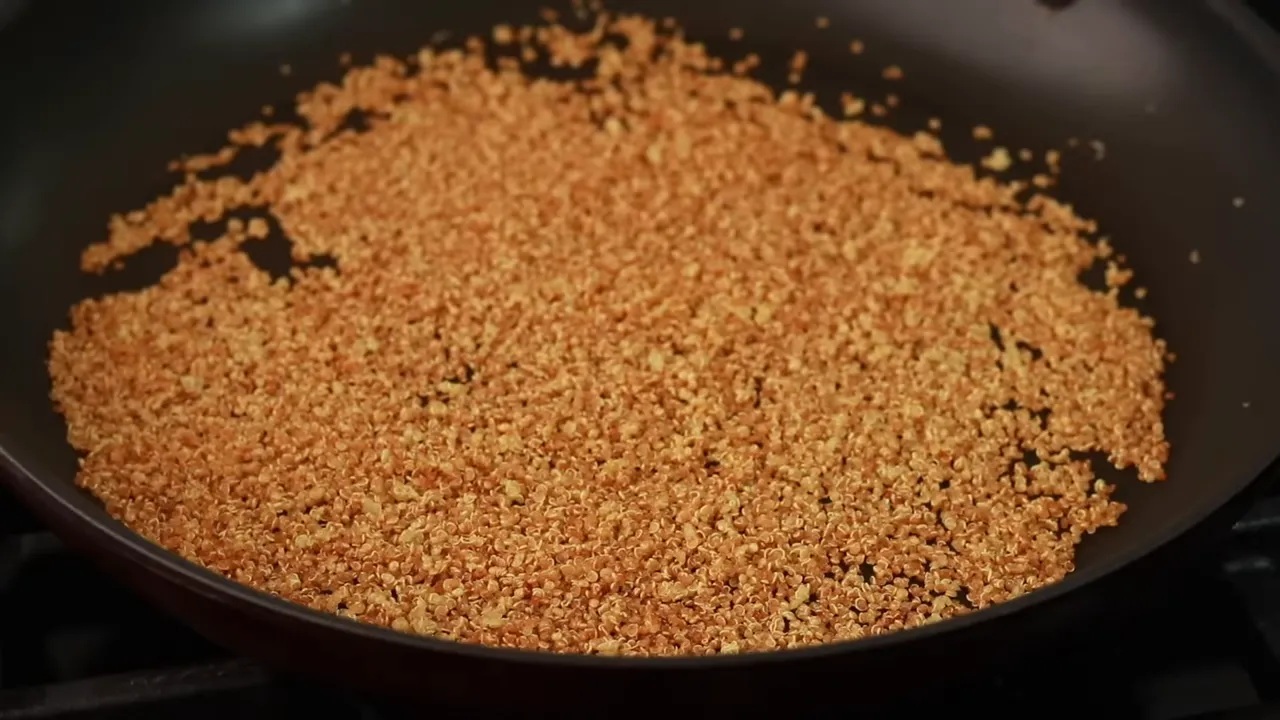
Once completely cool, store the plain crispy quinoa in an airtight jar at room temperature for up to about a month.
Season Crispy Quinoa Just Before Serving
At this point, you have accomplished something wonderful with texture. Flavor-wise? There is still work to do.
Crispy quinoa holds its crunch surprisingly well with relatively wet ingredients, but I still recommend dressing only the amount you plan to serve.
A useful seasoning formula is:
- Something acidic: lemon juice, lime juice, pomegranate molasses, or vinegar
- Something aromatic: za’atar, smoked paprika, or other spices
- Olive oil
- Salt
Mix the seasonings first, then add the crispy quinoa and stir to coat. Taste and adjust the salt and acidity.
Three flavor combinations
- Pomegranate and za’atar: pomegranate molasses, olive oil, salt, and za’atar. The blend I use contains sesame seeds, sumac, mint, and thyme. Here is the za’atar I use.
- Moroccan-inspired: cinnamon, cardamom, cumin, coriander, lemon juice, and olive oil.
- Spanish-inspired: smoked paprika, sherry vinegar, and olive oil, with salt to taste.
Scatter the seasoned crunch over vegetables, salads, or crudo. A snap pea and pistachio salad is a particularly lovely place for it.
The restaurant trick is not complicated. Wash consistently, match the water to your pot, and give the quinoa time to rest before handling it. For the crispy version, keep the layer thin, the oil minimal, and the heat patient. Quinoa rewards a little restraint.
|


