What could be better than a braised short rib? A beef cheek. Imagine the same deeply beefy flavor, but with a finer grain and a more buttery texture. Then imagine getting all that richness without quite so much fat.
Cheeks are muscles, not organs like liver or kidneys. Their great talent is collagen, distributed in layers throughout the meat. Think of puff pastry, except the layers become gelatin instead of melted butter. Give those layers enough time to soften, and the result is spectacularly succulent meat that can still hold its shape.
My recent cheek obsession began in Spain. I bought pork cheeks from a butcher in Costa Brava and cooked them in my Airbnb. That was the moment I decided this cut needed to become a regular part of my life. In Barcelona, even airport fast-food restaurants offered braised pork cheeks. Back home in the United States, finding them required a little more determination.
Table of Contents
- Where to Buy Beef Cheeks and What to Pay
- Red Wine Braised Beef Cheeks: Ingredients
- 1. Trim Only What Needs Trimming
- 2. Choose a Pan That Fits the Meat
- 3. Dry, Season, and Brown the Cheeks
- 4. Build the Sauce
- 5. Cover with Parchment and Braise Gently
- 6. Test Tenderness, Not Just Temperature
- 7. Rest in the Sauce, Then Strain and Chill
- 8. Reheat Thoroughly and Finish the Sauce
- Serve with a Little Green, If You Like
Where to Buy Beef Cheeks and What to Pay
In the Boston area, I have found beef cheeks at Savenor’s in Cambridge and Alpine Butcher in Lowell, Massachusetts. Call before making a trip, because neither shop necessarily has them every week. I have had better luck with availability at Savenor’s.
I tested both fresh and frozen cheeks and got equally good results. Do not let a frozen product discourage you.
Expect specialty-butcher prices in the neighborhood of $15 to $20 per pound, though prices will vary. That can sound expensive for a braising cut until you consider the usable yield. Well-trimmed cheeks have essentially no waste. Bone-in short ribs can lose a substantial share of their purchased weight to bones, gristle, and excess fat.
Cheeks are also very rich. A pound of raw, trimmed cheek can serve two to three people, and one large beef cheek can comfortably serve two. Once I accounted for yield and portion size, cheeks were no more expensive than short ribs, and I preferred both cooking and eating them.
Be careful when comparing prices. Some inexpensive supermarket cheeks, including Walmart products I researched, were described in reviews as heavily untrimmed and very fatty. A low price per pound is not much of a bargain if you discard much of what you buy.
If local sourcing fails, online options exist. I have ordered these pork cheeks from Heritage Foods, which work well with this preparation and can be less expensive online than beef cheeks. Beef short ribs also work with the same basic method. Whatever cut you choose, judge doneness by tenderness rather than assuming an identical cooking time.
Red Wine Braised Beef Cheeks: Ingredients
Serves about 10. Plan on 4 to 5 hours for braising, followed by cooling and preferably an overnight stay in the refrigerator. Reheating takes another 30 to 45 minutes.
For the braise
- 5 pounds (2.25 kg) beef cheeks, well trimmed
- 2 to 4 tablespoons neutral, high-smoke-point oil, such as vegetable oil
- Salt and black pepper
- 1 large carrot, sliced
- 1 large yellow onion, sliced
- 4 garlic cloves, chopped
- ¼ cup tomato paste
- 2 cups brown chicken stock, preferably unsalted or low-sodium
- A handful of thyme sprigs
- 2 bay leaves
- 2 star anise, optional
- 1 to 2 cinnamon sticks, optional
- 1 cup pitted prunes, preferably non-sorbate, optional
- One 750 ml bottle red wine
- Additional stock or water, as needed to almost cover the meat
For finishing
- Pomegranate molasses, about ½ to 1 teaspoon per cheek, to taste, or a small splash of balsamic vinegar
- Equal parts room-temperature butter and all-purpose flour, only if the sauce needs thickening
- Parsley salsa verde, optional
The thyme, bay leaves, cinnamon, and star anise give the sauce a lovely autumnal fragrance, but none is mandatory. Use what you have. The prunes are optional too. If you want sweetness without the fruit, substitute a couple of tablespoons of brown sugar.
1. Trim Only What Needs Trimming
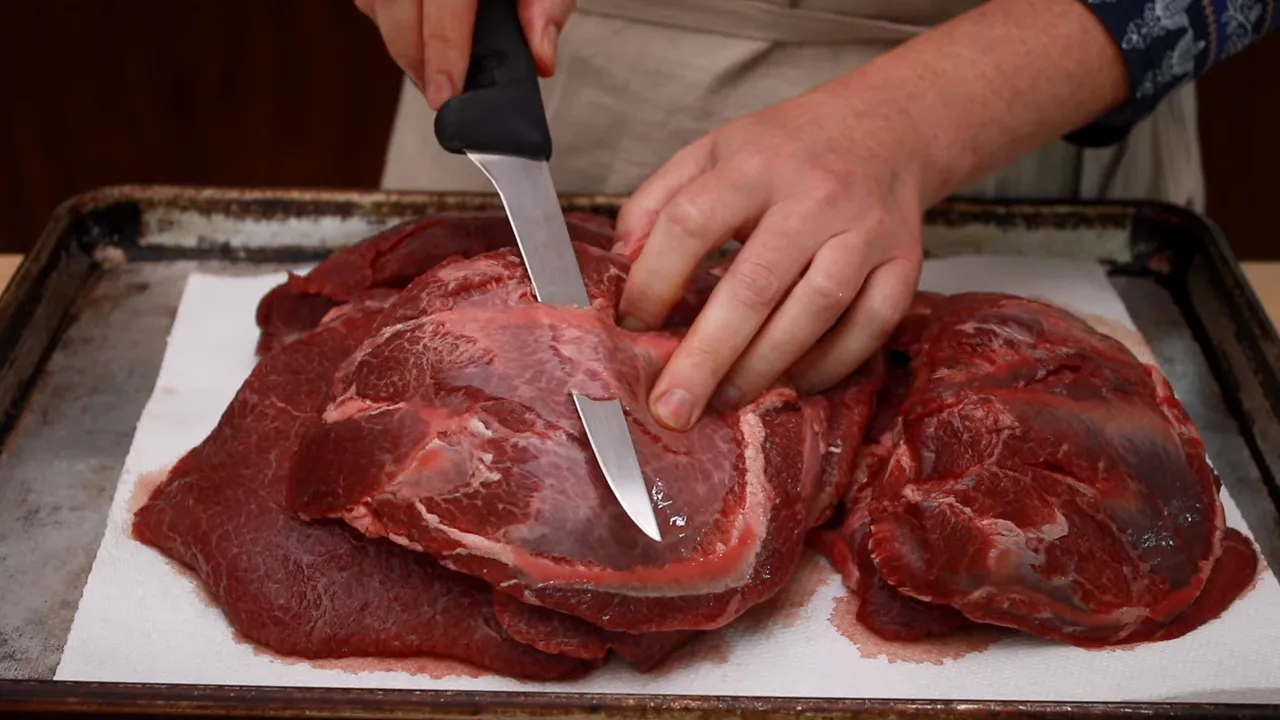
Well-trimmed cheeks may have just a paper-thin layer of connective tissue on one side. Leave it alone. It will soften during cooking, and removing it is unnecessary work.
If your cheeks have a thick outer layer of gristle, remove that with a boning knife:
- Slide the blade under the tough layer, with the cutting edge pointing to the right.
- Cut to the right to create a flap you can hold.
- Turn the knife around and cut back to the left beneath the flap.
If you are left-handed, reverse the directions. Keep the blade close to the tough layer so you leave as much meat behind as possible.
2. Choose a Pan That Fits the Meat
A stainless steel pan or a Dutch oven can work. The important consideration is shape: you need enough surface area for browning and sides tall enough to contain the meat and liquid.
My 12-inch straight-sided skillet fits the cheeks almost in a single layer, with only a little overlap at the thin edges. My Dutch oven fits fewer cheeks across its base, forcing the last pieces onto a second layer.
That difference matters. Stacked meat requires much more liquid to keep the upper pieces covered, and exposed pieces can dry out.
Aim for an even layer of meat rather than a pile. If your pot cannot accommodate whole cheeks evenly, cut each cheek into four pieces and distribute them more uniformly. You will have something closer to a stew, but the relationship between meat and liquid will be much better.
3. Dry, Season, and Brown the Cheeks
Dry the cheeks very thoroughly with paper towels, then put them on a dry surface. Drying the meat and returning it to a puddle defeats the purpose.
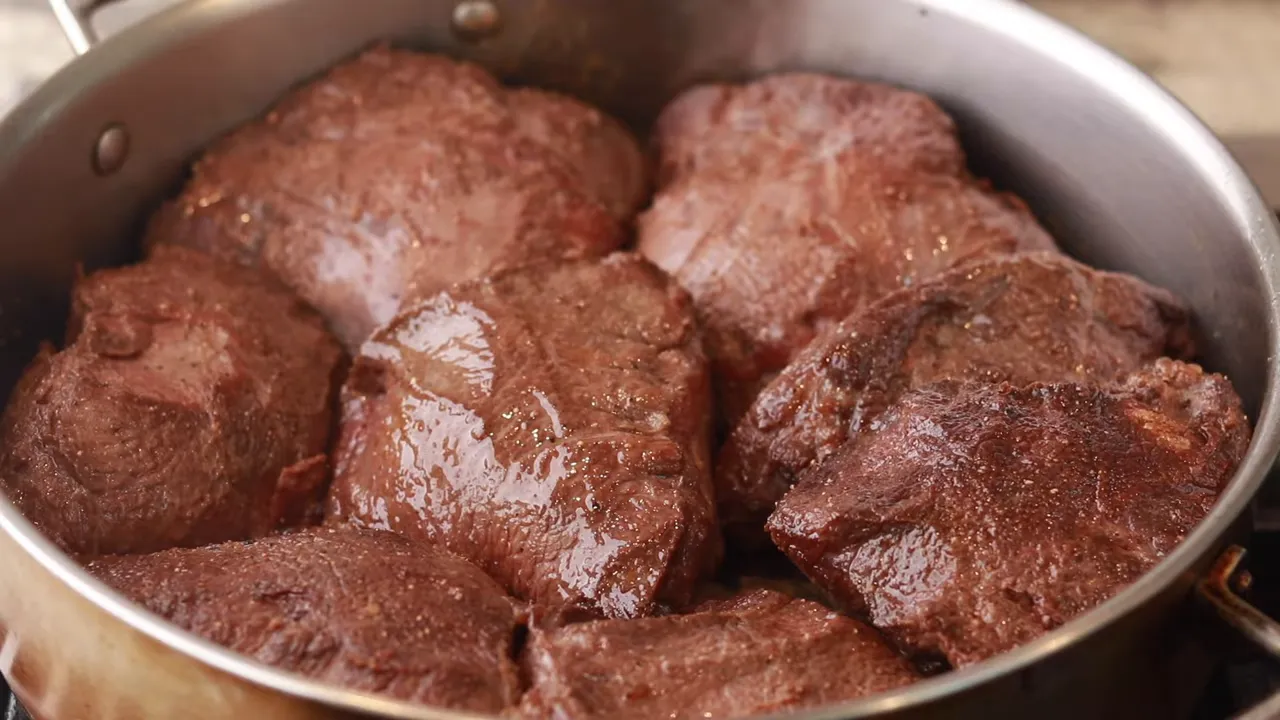
Set your pan over high heat and add enough oil to coat the bottom. While the pan heats, season only the cheeks that will go into the first batch with salt and pepper. In this workflow, seasoning several minutes ahead gives the salt time to draw moisture onto the surface.
Add the cheeks without crowding and leave them undisturbed until browned. Flip and brown the other side. Adjust the heat as necessary: once the meat begins taking on color, you can lower it slightly to avoid excessive smoke. Transfer the browned meat out of the pan and repeat, adding oil as needed.
I sometimes use two pans to speed up browning, then combine everything for the braise. If you do this, make sure the flavorful brown residue from both pans makes it into the dish.
Do not worry about achieving a dark, perfectly even crust. Think of this as browning the pot as much as browning the meat. Those brown bits on the bottom will give the sauce a deeper meat flavor.
4. Build the Sauce
Add the carrot and onion to the browning pan with a pinch of salt. Reduce the heat to medium-low and cook, stirring occasionally, until the vegetables begin to brown.
Add the garlic and another small pinch of salt. Cook for about a minute, stirring frequently. Add the tomato paste and stir constantly until it is distributed through the vegetables and begins to sizzle.
Which stock should you use?
I use brown chicken stock made with roasted chicken and reduced to one-quarter of its original volume. It is concentrated and very gelatinous, rather like a chicken version of demi-glace.
For this recipe, ½ cup of that fourfold-reduced stock plus 1½ cups water replaces 2 cups of regular stock. Reducing stock before freezing saves space; you can restore the water when cooking. Frozen stock can go straight into the pan and melt there.
If you would like to make your own, my brown chicken stock using rotisserie chicken is one option.
Store-bought stock is fine too, but choose unsalted or at least low-sodium. The sauce will reduce, and its salt will become more concentrated.
There is no need to panic if your stock does not gel. Although added gelatin can help some braises, cheeks bring so much collagen of their own that they do much of that work for you.
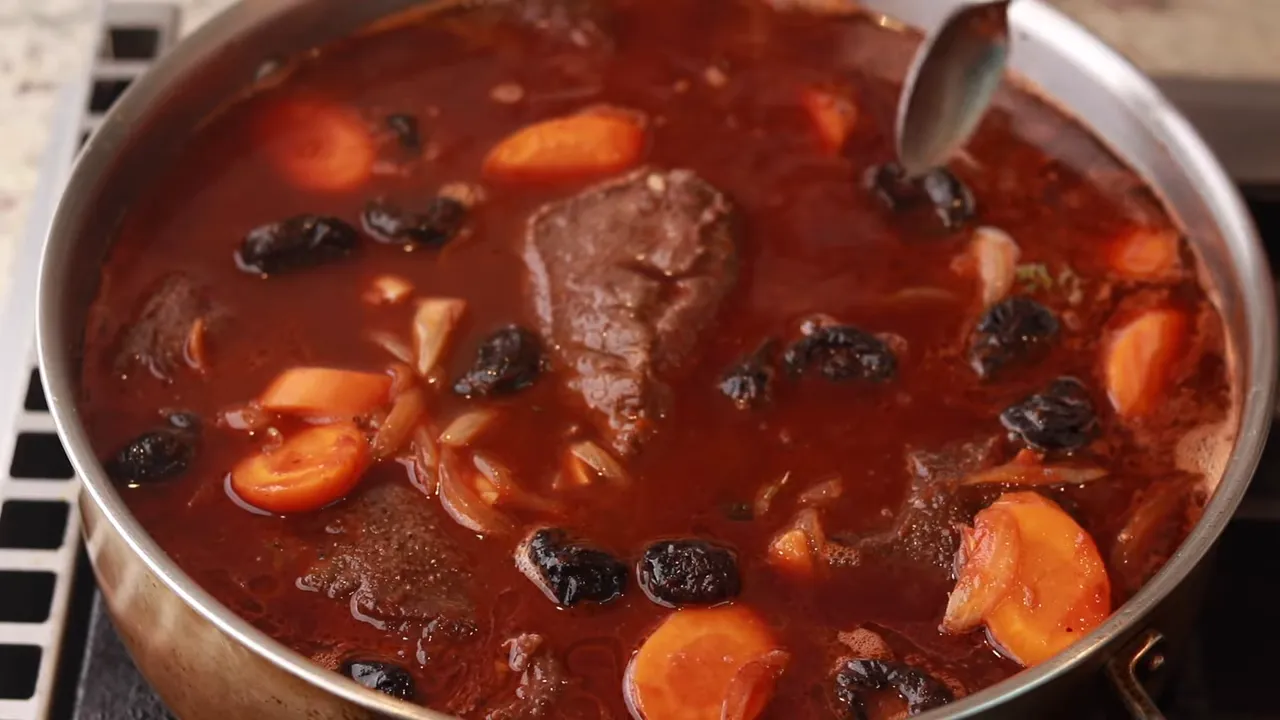
Add the aromatics, prunes, and wine
Heat the oven to 300°F (150°C), with a rack in the middle.
Return the cheeks to the sauce, or pour the sauce over them in your chosen braising pan. Tuck the thyme, bay leaves, cinnamon, and star anise beneath the meat so they have good contact with the liquid.
Add the prunes. I prefer non-sorbate prunes because they are drier and hold together better. Softer, sorbate-treated prunes may dissolve into the sauce. That is not bad, just a different result.
Pour in the red wine, leaving any sediment behind in the bottle. Choose something that is neither very tannic nor very acidic. An inexpensive Syrah blend from southern France works nicely.
Now assess the liquid level. Add more stock or water as needed. You should still see the surface of the meat, but no more than about ¼ inch should protrude above the liquid.
5. Cover with Parchment and Braise Gently
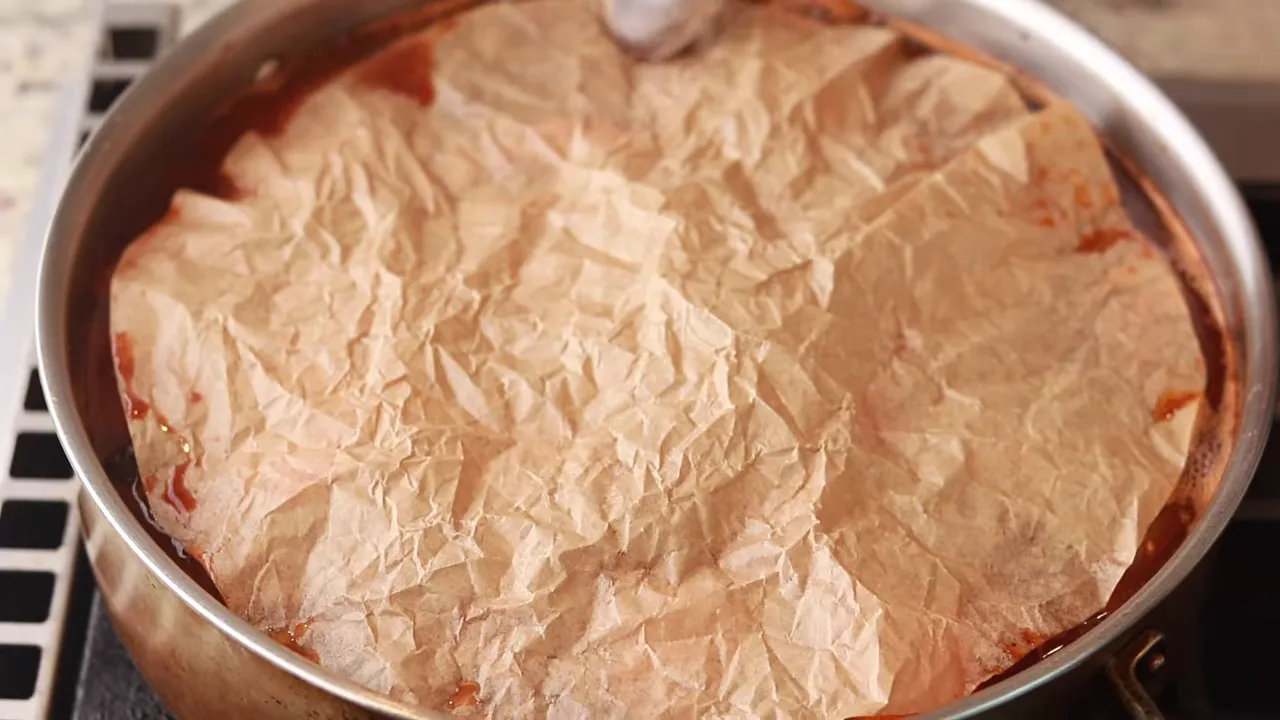
You can use a lid, but for most braises I prefer a round of parchment directly on the surface. It allows some evaporation, helping the liquid become a sauce, while protecting the top of the meat from drying out. A tightly covered pot also tends to simmer more vigorously in the oven.
- Fold a sheet of parchment and cut it into a circle that fits inside the pan.
- Crumple it so it becomes easier to mold.
- Lay it over the meat and use a spoon to tuck the edges into the liquid.
Bring the liquid to a simmer on the stovetop, then transfer the pan to the middle of the oven. Cook for 4 hours before beginning to test. Do not be surprised if the cheeks need 5 hours.
The great mistake here is stopping too early. Another half hour is generally far less concerning than serving cheeks whose connective tissue is still tough.
6. Test Tenderness, Not Just Temperature
A thermometer alone cannot tell you whether a braise is ready. Reaching a temperature such as 190°F does not instantly turn collagen into gelatin. The meat needs both heat and time.
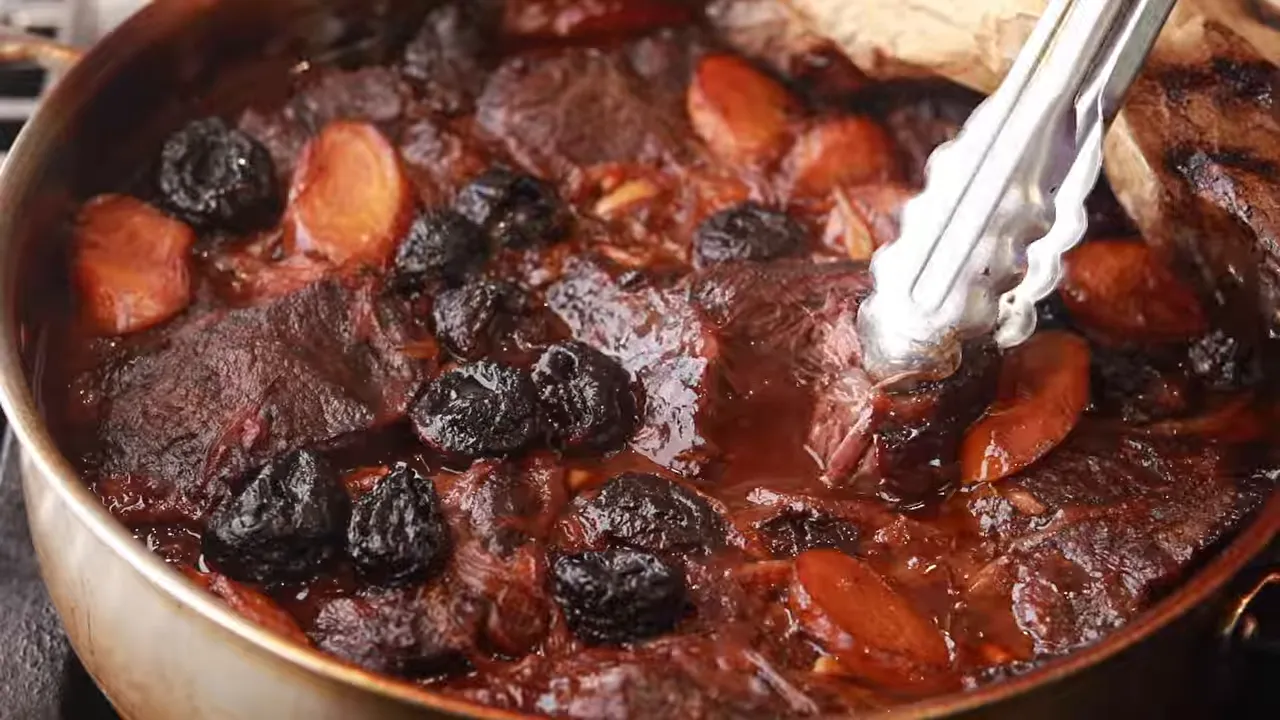
Push a chopstick or another dull cooking utensil into a cheek. It should meet essentially no resistance. For a second check, gently pull one piece apart with tongs. The fibers should separate with very little effort.
If they resist, continue cooking. Tough, gristly cheeks usually need more time, not a more forceful knife.
7. Rest in the Sauce, Then Strain and Chill
When the braise comes out of the oven, flip the cheeks over in the sauce. This helps even out the texture between the upper and lower surfaces.
I find that a braise served immediately tastes drier than one allowed to rest in its liquid. I cannot confidently explain the mechanism, and I would not claim to have proved that the meat absorbs sauce. But the practical difference is enough for me to make resting part of the method.
Once the cheeks have cooled to warm rather than hot, lift them out and reserve the prunes separately. Strain the sauce through a fine-mesh sieve. It will be thick enough to need encouragement: press firmly with a ladle to extract as much sauce as possible, then discard the solids.
For safe cooling, divide the meat and sauce into shallow containers and refrigerate promptly, within 2 hours of leaving the oven. Do not leave a large pot on the counter waiting for it to become completely cold. Chill overnight if possible.
For storage, follow the USDA’s leftover safety guidance: refrigerate for 3 to 4 days, or freeze for longer storage. The cheeks and sauce freeze well for a few months.
8. Reheat Thoroughly and Finish the Sauce
Once chilled, the sauce should be gelatinous. Unlike short-rib sauce, it may have only a thin coating of fat on top. Scrape off that fat anyway; gelatinous richness is lovely, greasiness is not.
Reheat only the meat and corresponding proportion of sauce you need. For example, if you are serving one cheek from a batch of eight, use roughly one-eighth of the sauce.
- Heat the sauce over medium heat until it melts.
- If watery, boil it down until slightly syrupy.
- Add pomegranate molasses to taste for acidity and gloss, or use a tiny splash of balsamic vinegar.
- Taste and adjust the salt.
- Add the cheeks, cutting large ones into serving portions if desired.
Cover and warm over moderately low heat for about 30 minutes, flipping occasionally. Add a little water whenever the sauce becomes too thick or sticky.
Alternatively, reheat covered in a 325°F (160°C) oven for 30 to 45 minutes. Return the reserved prunes toward the end so they warm without unnecessary handling.
The goal is not merely to take the chill off. The thick layers of gelatin need to melt again for the meat to regain its buttery texture. Check that the fibers once again separate easily. For leftover food safety, reheat the meat to 165°F as well.
If the sauce needs thickening
My cheek sauce usually needs no thickener. If yours does, use a smooth paste of equal parts room-temperature butter and all-purpose flour, known as beurre manié.
A small starting batch is 1 teaspoon butter mashed with 1 teaspoon flour. You can prepare roughly that amount per pound of meat, but you may need much less.
- Remove the warmed meat from the sauce.
- Whisk in a tiny amount of the butter-flour paste.
- Bring the sauce back to a simmer, whisking thoroughly.
- Wait 30 to 60 seconds, then assess the consistency.
- Repeat only if necessary.
Do not keep adding paste before the sauce simmers. The flour needs that heat to thicken, and impatience can turn a lovely sauce into something far too heavy.
Serve with a Little Green, If You Like
Spoon the glossy red wine sauce over the cheeks and add the reserved prunes. I like a little parsley salsa verde on top, a green sauce in the same general family as pesto, but it is completely optional.
What makes cheeks so remarkable is the combination of structure and softness. They can sit neatly on the plate, then surrender to the gentlest pull of a fork. I do not use superlatives lightly, but this is about as succulent and beefy as dinner gets.
If you are in the Boston area and would like to cook together, I also teach in-person classes at Helen’s Kitchen in Natick, Massachusetts.
|


