Those little oval plums called Italian plums, or prune plums, are my favorite plums for tarts. They hold their shape beautifully, and their flavor after baking is hard to beat.
Their season happens to overlap with the US Open, so this tart has become my contribution to the annual finals party hosted by my wonderful teammate Amanda. In my kitchen, it is the US Open tart.
But you certainly don’t need a tennis match to make it. You need a buttery crust, upright rows of plum quarters, and a little patience with chilling. The reward is a tart that is not only beautiful on top, but brown and crisp underneath. That second part matters.
Table of Contents
- Ingredients and Equipment
- Day 1: Make the Pie Dough
- Day 2: Roll the Dough and Fit the Ring
- Make the Plum Filling
- Bake, Glaze, and Finish
- Cool Before Slicing, Even If You Want It Warm
Ingredients and Equipment
This recipe makes one 9-inch (23 cm) plum tart. The dough recipe makes three portions, so you can freeze the other two for another day.
Pie dough: enough for three 9-inch tarts
- 212 g unbleached all-purpose flour, for the food processor
- 2 teaspoons Diamond Crystal kosher salt, or 1 teaspoon table salt
- 26 g (2 tablespoons) granulated sugar
- 284 g (2½ sticks) cold unsalted butter, sliced ¼ inch thick
- 142 g unbleached all-purpose flour, for the mixing bowl
- 57 g very cold water
- 57 g very cold, unflavored vodka
If weighing the salt, use 5.7 g of any salt on a scale with 0.01 g precision. Don’t substitute another brand of kosher salt teaspoon for teaspoon for Diamond Crystal.
I use King Arthur unbleached all-purpose flour. Keep the two flour quantities separate: they go into the dough at different stages.
Plum filling and glaze: for one tart
- 250 g prepared pie dough, one-third of the batch
- 600 g pitted Italian prune plums, quartered; buy about 1½ pounds whole plums
- 90 g granulated sugar
- 12 g tapioca starch
- ½ teaspoon cinnamon
- 2 teaspoons lemon juice
- 2 tablespoons apricot preserves
Why I use a tart ring
I prefer a bottomless tart ring set on a parchment-lined baking sheet to a tart pan with a removable bottom. The ring lets the dough sit on the baking sheet with only parchment underneath, which gives me faster browning and makes it possible to skip prebaking.
The no-prebake method here depends on that baking setup. If you have a false-bottom tart pan, follow these instructions for par-baking the shell instead.
A food processor, kitchen scale, silicone spatula, pastry scraper, rolling pin, and kitchen shears are also useful. A French rolling pin gives me particularly good control, but any rolling pin will do.
Day 1: Make the Pie Dough
I recommend making the dough the day before baking. It can stay in the refrigerator for up to five days, so there is no need to leave this job until the last minute.
1. Chill the sliced butter
Spread the butter slices on a plate. Refrigerate for 30 minutes or freeze for 15 minutes before processing.
2. Process the butter with the first portion of flour
Put the 212 g flour, salt, and sugar into a food processor. Process for five seconds to combine.
Distribute the cold butter evenly over the flour. Give it about fifteen one-second pulses. These should be full seconds, not little taps on the button.
The important thing is to process the butter enough. You want the mixture to resemble finely grated Parmesan, not a bowl of flour with large butter chunks.
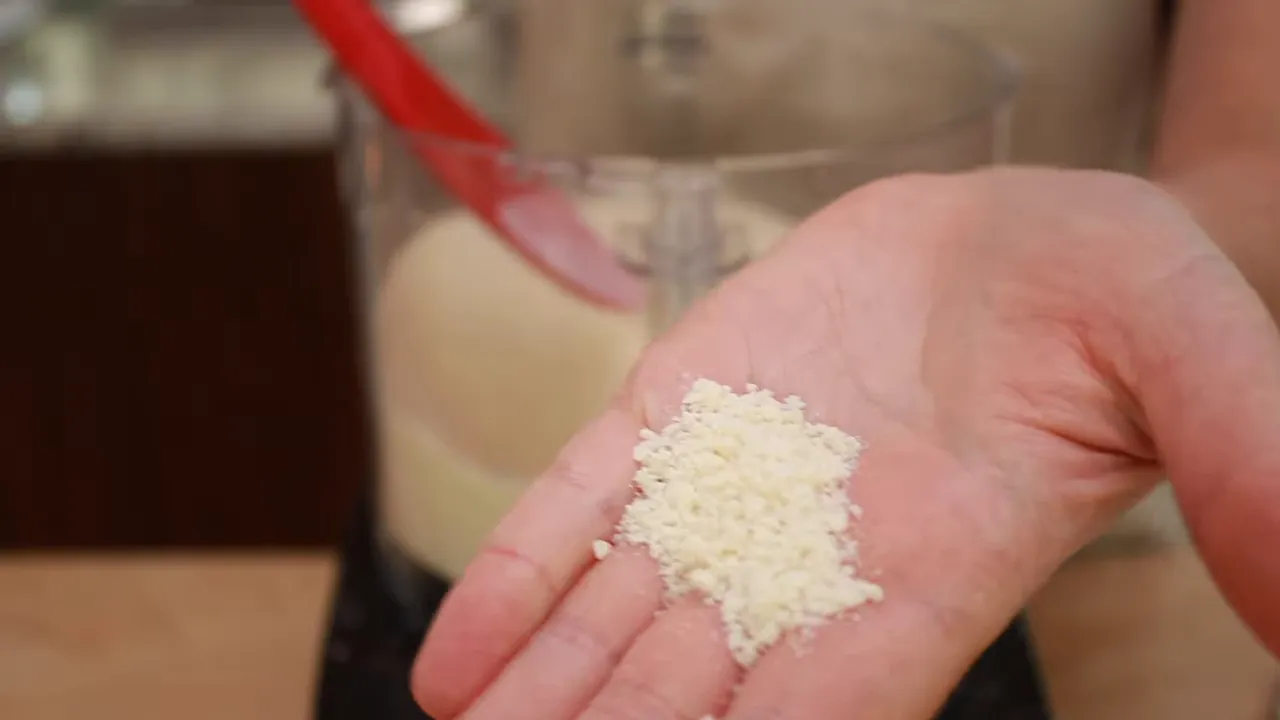
3. Mix in the remaining flour
Put the remaining 142 g flour into a large bowl. Add the mixture from the food processor and toss thoroughly with a large spoon or spatula for 45 to 60 seconds.
There is no need to be timid at this stage. Before adding the liquid, you don’t have to worry about developing gluten through mixing.
4. Add the cold liquid
Combine the cold vodka and cold water. Cheap, unflavored vodka is exactly what we want. This is not the moment to get creative.
Add the liquid to the flour mixture and mix with cutting motions, using a large spoon or silicone spatula. I like a spatula because I can also press with its back to encourage the dough to stick together.
5. Squeeze the dough together
Once the liquid is reasonably evenly distributed, start squeezing the dough into fistfuls. Crumbs will fall out. That is normal, not a sign that your pie dough has failed.
Work from small clumps to larger clumps, then combine them into one mass. Favor squeezing over repeated folding to limit gluten development. If dough sticks to your hands, scrape it off with a spatula or pastry scraper.
Press the dough firmly into the loose crumbs at the bottom of the bowl. Flip it periodically: the upper surface tends to be stickier and will help pick up more crumbs. A couple of folds at the very end are fine.
6. Portion, wrap, and chill
Line a small bowl with plastic wrap and weigh out three portions of about 250 to 255 g each. Shape each into a disc, wrap tightly, and flatten slightly with a rolling pin. Make the discs as round as you can. A round starting shape makes rolling easier later.
- For this tart: Use one 250 g disc.
- For chilling: Refrigerate overnight if possible, or at least two hours.
- For making ahead: Refrigerate for up to five days, or freeze the wrapped discs in a freezer bag for future use.
- For frozen dough: Move it to the refrigerator 24 hours before using.
- For larger pastries: Instead of three small discs, divide the batch into two portions of about 380 g for 11-inch tarts or 9-inch pies.
Day 2: Roll the Dough and Fit the Ring
Make cold dough pliable without warming it up
Flour the counter and the dough. Give the dough firm taps with a rolling pin, keeping its thickness even. This makes the butter pliable while the dough stays cold.
Small cracks around the edges are perfectly ordinary, but fix them now. Little cracks become big cracks when you roll. Squeeze the edges firmly together before proceeding.
Roll from the center and keep rotating
Start in the middle and roll away from yourself, then start in the middle and roll toward yourself. After each pair of strokes, rotate the dough.
That constant rotation does two jobs: it helps keep the shape round, and it alerts you to sticking before the dough becomes firmly attached to the counter. If it stops moving easily, loosen it with a pastry scraper and add flour underneath.
A tapered French rolling pin lets me apply pressure to specific areas. If one section is thicker, I can tilt the pin and redistribute the dough rather than making the whole sheet thinner. My French rolling pin tutorial explains that technique in more detail.
Roll to about ⅛ inch (3 to 4 mm) thick.
Chill the rolled dough
Fold the dough in half and then in half again for transfer, brushing away excess flour underneath. Move it to a parchment-lined baking sheet and unfold it.
Chill for about 30 minutes, or at least 20 minutes if you are short on time. This rest lets the rolled dough relax before it goes into the ring, reducing shrinkage during baking. If holding it longer, cover with plastic after the first 30 minutes.
You can fit it into the ring immediately if you must, but I prefer the extra rest.
After chilling, slide the parchment and dough off the cold baking sheet. Give the dough a few minutes, usually about two to five, to become pliable enough to fit without cracking.
Fit without stretching
Set the ring on a parchment-lined baking sheet and ease the dough into it. Lift the edges and let the dough settle into the corners. Do not stretch it. Whatever you stretch now will want to shrink in the oven.
Press firmly against the walls. Trim with kitchen shears, leaving about a ¾-inch overhang. Fold that excess inward and press firmly to reinforce the sides.
If there is too much dough in one area, cut some away. If another area is thin or short, tuck a scrap into the fold. We are making a tart shell, not passing a test in cutting perfect circles.
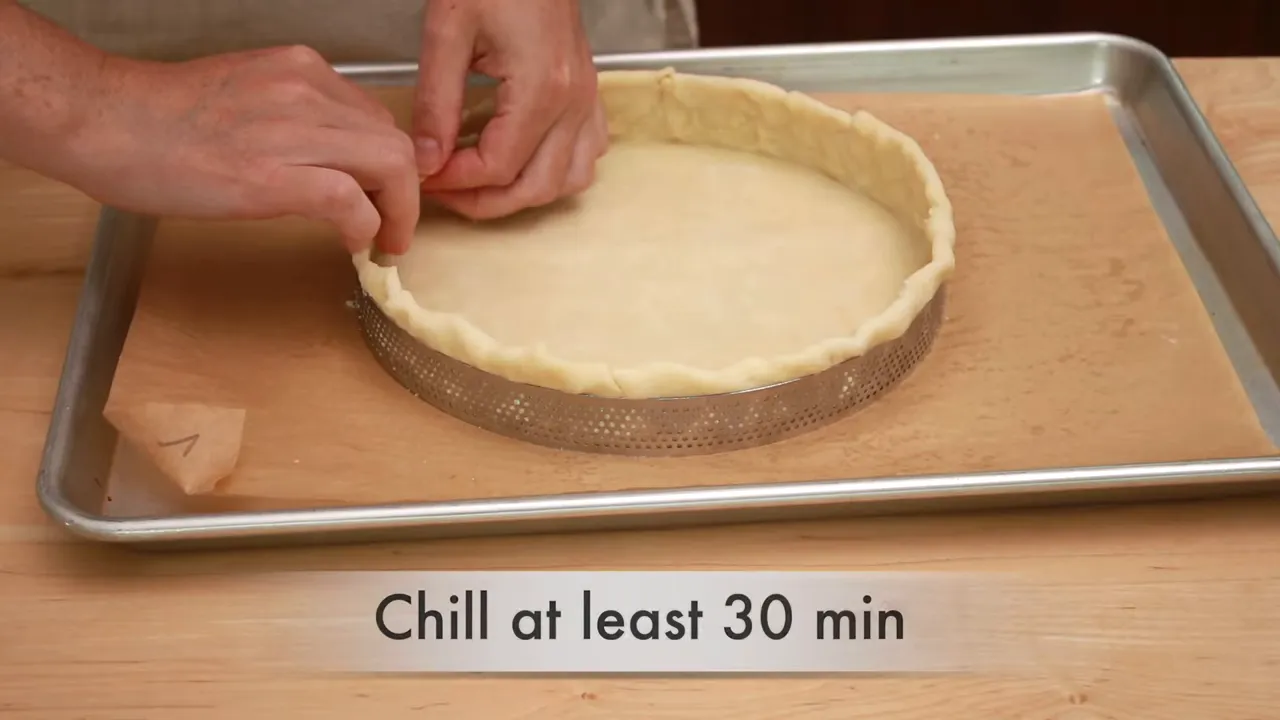
Refrigerate the fitted shell for an hour if possible, with 30 minutes as the minimum. If chilling longer than an hour, cover it with plastic after the first hour.
I used to freeze my shells for this method. After more testing, I found that the refrigerator works just as well, and I usually have more room there. It is the baking surface, not freezing, that makes skipping prebaking possible.
Make the Plum Filling
Position oven racks in the upper and lower thirds and heat the oven to 400°F (200°C).
Halve the plums, remove the pits, and halve each piece again. Weigh out 600 g after pitting.
In a small bowl, thoroughly combine the sugar, tapioca starch, and cinnamon. Toss the plums with the lemon juice, using your hands to coat them evenly.
Just before filling and baking, add the sugar mixture. Toss until the sugar is moistened and clings to the fruit.
A useful fruit-filling ratio
The sugar and starch quantities are based on the weight of the pitted fruit:
- Sugar: 15% of the fruit’s weight.
- Tapioca starch: 2% of the fruit’s weight.
This is a useful starting ratio for many fruit fillings. For our 600 g of plums, it gives us 90 g sugar and 12 g tapioca starch.
Arrange the plums upright
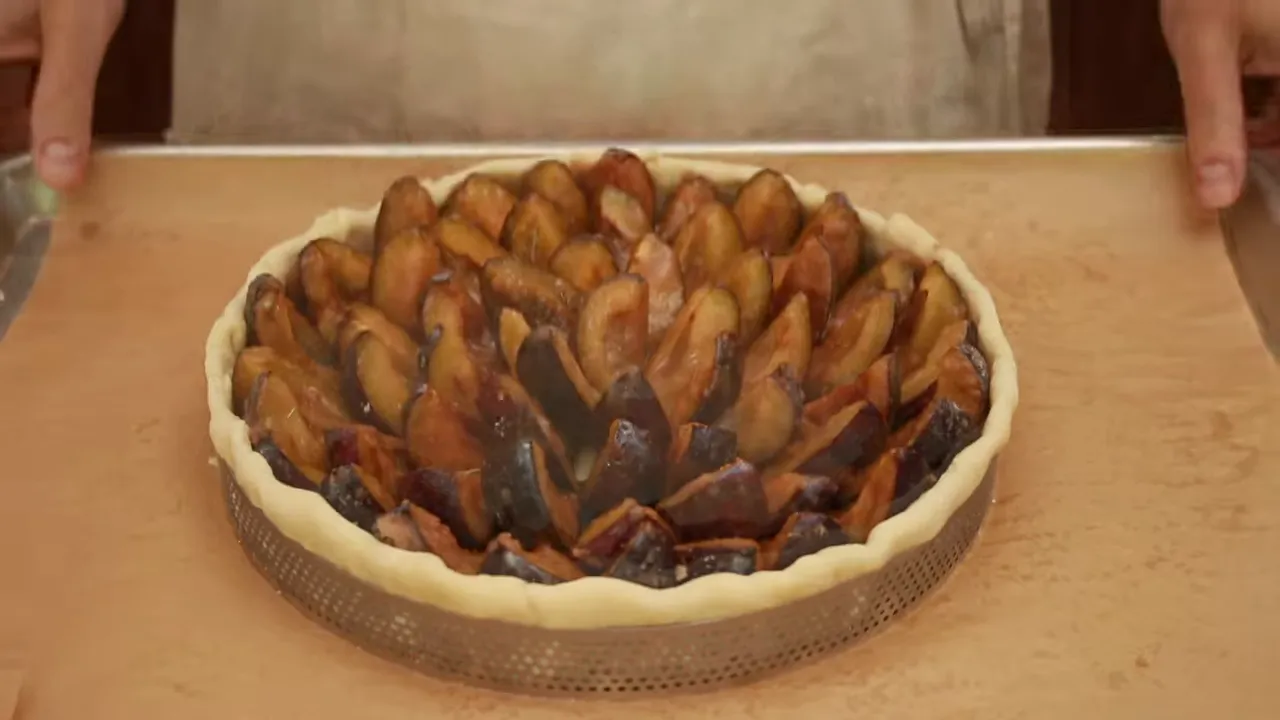
Stand the plum quarters vertically in the chilled shell. Start against the outer rim, then work inward in smaller and smaller circles until the shell is full.
Drizzle any moistened sugar mixture left in the bowl over the arranged fruit.
Bake, Glaze, and Finish
- Brown the crust on the lower rack. Bake in the bottom third of the oven for about 40 minutes, or until the dough is golden brown.
- Liquefy the preserves. Microwave the apricot preserves for a few seconds, until fluid. Strain through a fine-mesh sieve if you want a smooth glaze. I often don’t bother.
- Glaze the plums. Remove the tart from the oven and drizzle the preserves as evenly as possible over the fruit.
- Finish on the upper rack. Return the tart to the top third of the oven for about five to ten minutes, until the plums have browned and the juices are bubbling. If you have convection, this is a good time to turn it on.
The apricot glaze does more than make the tart pretty. It helps the plums keep their shine after cooling, and it improves the flavor too.
Cool Before Slicing, Even If You Want It Warm
Let the tart cool for at least an hour. The juices need time to set before you cut into it.
If a little dough has crept over the outside of the ring, carefully trim it with a bread knife before lifting off the ring.
Chilling throughout the process helps the shell keep its shape without shrinking or collapsing. But the real test is underneath.
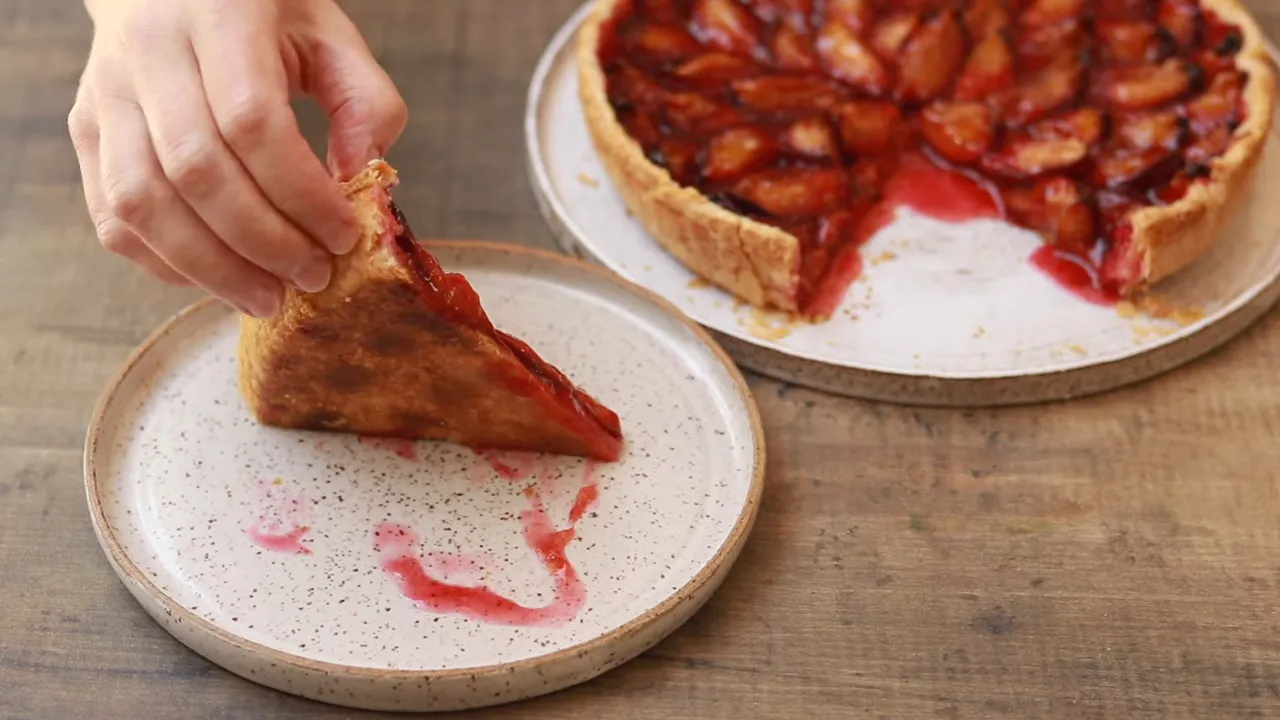
Brown and crisp. That is a happy sight.
The tart is excellent at room temperature. You can make it earlier in the day and leave it unrefrigerated for serving that day. If you prefer it warm, first let it cool and set, then reheat at 325°F (160°C) for five to ten minutes.
And remember those two extra discs of dough? They are just right for a blueberry galette and a tomato, onion, and Gruyère tart. One batch of dough, three very good reasons to bake.


