Beautiful fresh egg pasta should be silky, supple, and pleasantly chewy. It should not be the reward for three hours of work that leaves you wishing you had opened a box of dried pasta. My first attempt belonged firmly in that second category.
The problem is that experienced pasta makers often teach by touch and feel. They are native speakers of pasta. They can adjust the dough without thinking about measurements, just as you can speak your native language without thinking about grammar.
But if you are learning without an experienced pasta maker standing beside you, you need more than “add flour until it feels right.” You need reliable measurements, clear instructions, and an explanation of what can go wrong. Intuition comes later. Precision helps create it.
Table of Contents
- Fresh Egg Pasta Ingredients
- Which Flour Is Best: 00, Bread Flour, or All-Purpose?
- Weigh Both the Flour and the Eggs
- Should You Salt the Dough, the Water, or Both?
- Mix the Dough in a Food Processor
- Knead with Small Movements, Then Rest
- Choose Your Rolling Method and Prepare the Counter
- How to Roll Egg Pasta with a Machine
- How to Roll Pasta with a Rolling Pin
- Dry, Store, and Cut the Sheets
- How to Salt the Cooking Water
- Cook Briefly, Lift Out, and Sauce Immediately
- Precision Creates Pasta Intuition
Fresh Egg Pasta Ingredients
Makes 4 main-course portions or 6 first-course portions.
- 300 g flour: 00 flour intended for pasta, or King Arthur bread flour; all-purpose flour also works, with less chewy results.
- 5.7 g salt: 2 teaspoons Diamond Crystal kosher salt or 1 teaspoon table salt.
- 185 g total wet ingredients: 2 large eggs, 3 large yolks, and enough water to bring their combined weight to 185 g.
- Additional flour: all-purpose or 00 flour for rolling.
- Semolina: optional, for keeping sheets and cut ribbons from sticking.
The wet ingredients weigh 185 g altogether. That is not 185 g of water, and it is not 285 g of eggs and water.
You will also need a kitchen scale, plastic wrap, a chef’s knife, and either a pasta roller or a rolling pin. A food processor makes mixing much faster, although it is not essential.
Which Flour Is Best: 00, Bread Flour, or All-Purpose?
I made pasta with King Arthur unbleached all-purpose flour for years before testing 00 pasta flour. All-purpose certainly works. But the difference in texture was worth investigating.
American flour categories tell us something about protein content: cake flour is relatively low in protein, bread flour is higher, and all-purpose sits between them. The designation 00 does not tell you the protein content. You cannot assume that every bag marked 00 will behave the same way.
For this dough, choose a 00 flour specifically intended for pasta rather than buying any 00 flour you happen to find. The pasta flour I tested contained about 11.5 to 12.5 percent protein.
In my tests, the all-purpose version tended to move from firm to soft as it cooked, without quite developing the pleasantly yielding chew I got with 00 pasta flour. That chewy middle ground is what made the specialty flour appealing.
A later discovery: King Arthur bread flour works as well as the 00 pasta flour I originally recommended. If neither is available, use all-purpose. There is nothing wrong with learning the technique before spending money on specialty ingredients.
Weigh Both the Flour and the Eggs
Flour is a compressible powder. A cup can contain very different amounts depending on how you fill it. Eggs are variable, too. I have weighed eggs labeled large that ranged from 54 to 70 g in their shells.
That is why a formula such as “one cup of flour, one egg, and one yolk” is not as dependable as it sounds. A pasta formula is not a combination lock. It does not need to be memorable. It needs to work.
- Place a bowl on your scale and tare it.
- Add 2 large eggs and 3 large yolks, without their shells.
- Add just enough water to reach 185 g total.
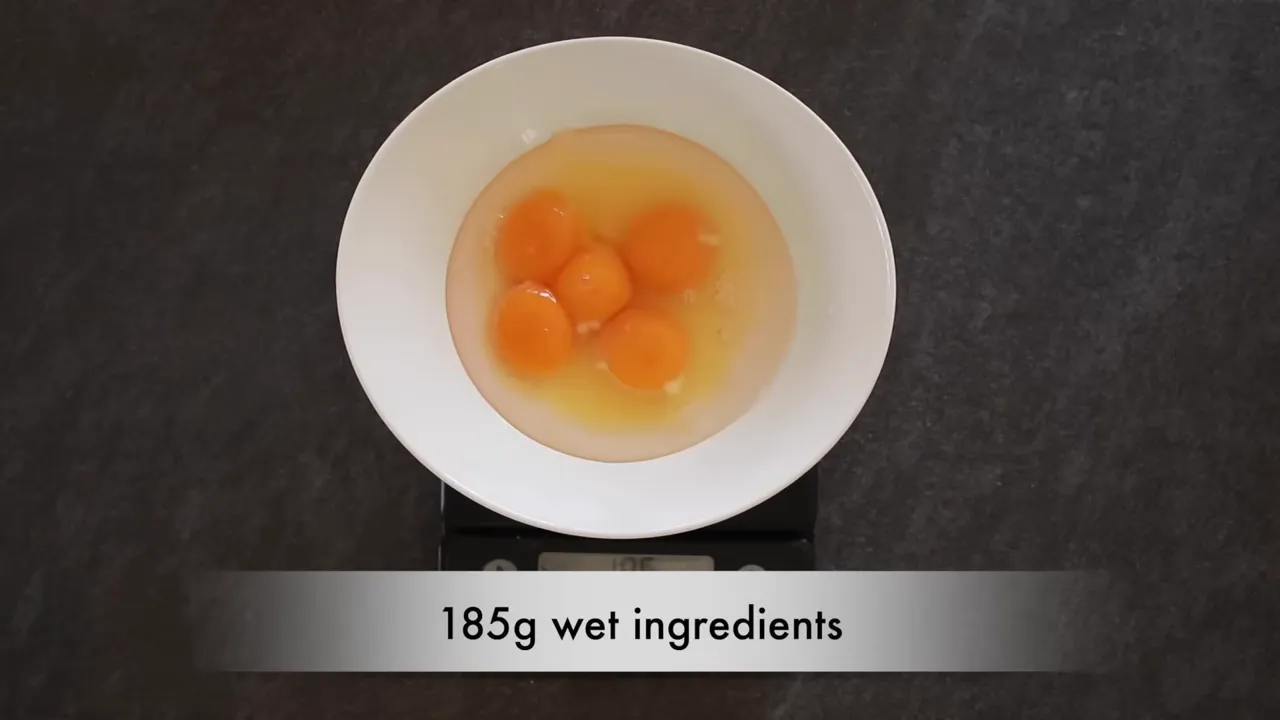
If unusually large eggs put you over 185 g before adding water, whisk the eggs and yolks together, then pour off enough to reach the target weight.
Humidity and flour differences can still require a small adjustment, but weighing gets you very close. Much closer than cups and guesswork.
Should You Salt the Dough, the Water, or Both?
I prefer to salt both.
One argument against adding salt to pasta dough is that it makes the dough firmer and harder to knead. I tested salted and unsalted doughs and did not find a meaningful difference in their handling.
The flavor question matters much more. Before the pasta reaches your mouth, it needs to be properly seasoned. You can accomplish that through the dough, the cooking water, or a combination of the two.
For 300 g flour, I add 2 teaspoons Diamond Crystal kosher salt or 1 teaspoon table salt. Avoid Morton’s kosher salt in the dough for this method because it does not dissolve as readily.
Even with salt in the dough, the cooking water still needs substantial seasoning. But starting with salted dough means the water does not have to do quite so much work. Extremely salty cooking water also becomes risky when you use it to loosen a sauce: a little too much can make the finished dish unpleasantly salty.
Niki Achitoff-Gray reached a similar conclusion in her fresh pasta testing at Serious Eats. Reproducing someone else’s results might not sound glamorous, but it is useful in cooking as well as science.
Mix the Dough in a Food Processor
- Put the flour and salt in the food processor. Process for about 10 seconds to combine.
- Add the eggs, yolks, and water.
- Process until a dough forms.
- Transfer everything to the counter, including loose flour and dough caught beneath the blade.
That last detail matters. At this stage, the dough is not completely homogeneous. If some of the measured flour stays in the processor, your carefully weighed formula is no longer the formula you are kneading.
You can mix by hand instead. My water-based pasta dough lesson explains the well method in detail. The food processor is simply much faster.
Do Not Add Flour Immediately
The dough may feel wet and sticky when it first comes out. Knead it for one full minute before deciding that it needs more flour. It will usually become much easier to handle as the ingredients come together.
During that first minute, rub the sticky dough off your hands and knead those crumbs back into the main dough.
If it still sticks to the counter after a full minute, knead in about a tablespoon of flour. Let that flour become completely incorporated before deciding whether to add more. Do not keep throwing flour at dough that has not had a chance to absorb the previous addition.
Knead with Small Movements, Then Rest
Pasta dough is much firmer than bread dough. Trying to fold the whole thing in half and rotate it 90 degrees after every push can be frustrating. The folds may refuse to stick together.
Use smaller movements instead:
- Fold a small section of dough toward you.
- Press it down with the heel of your hand.
- Rotate the dough slightly.
- Repeat, gradually wrapping the dough around itself.
Keep your fingertips raised as you press. Grabbing the dough with your fingers or smearing it too aggressively can tear the underside instead of smoothing it.
As you work, one side may develop a spiral while the underside becomes silky. That smooth underside is a useful sign that your kneading motion is working.
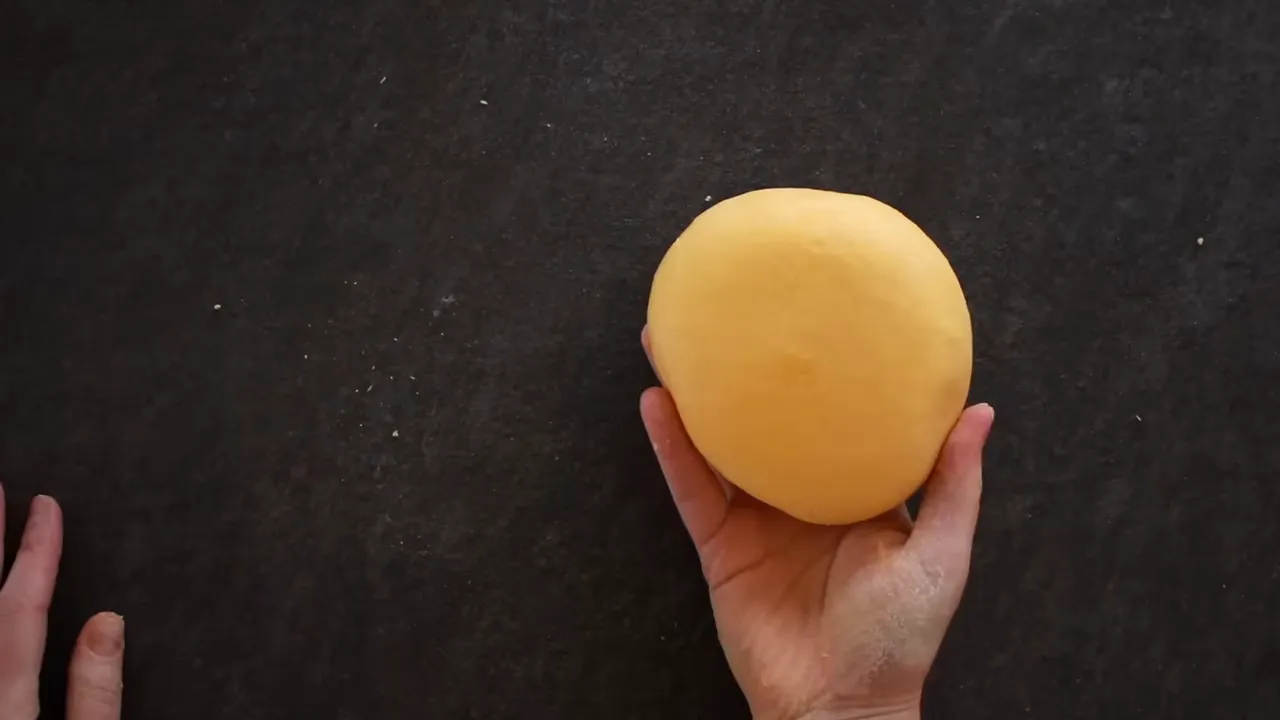
Insufficient kneading is a common beginner mistake. Unlike bread dough, this firm dough is not suited to a windowpane test. I use time as a practical guide. For this recipe, knead by hand for 12 minutes after mixing, following my updated written instructions.
I do not recommend using a stand mixer to knead this particular dough. It is very stiff. The mixer’s pasta-rolling attachment, however, is another story.
When kneading is finished, dust both sides of the dough with flour and wrap it tightly in plastic. Rest for at least 30 minutes at room temperature. This allows the gluten to relax so the dough does not keep shrinking as you roll it thin.
Choose Your Rolling Method and Prepare the Counter
You have three options: a stand-mixer pasta attachment, a hand-cranked tabletop roller, or a rolling pin.
- Stand-mixer attachment: my preference if you already own a compatible mixer. It leaves both hands free to manage the dough.
- Tabletop roller: works well, but it must be clamped securely. A silicone trivet between the clamp and table can improve grip. Keep inward pressure on the crank as you turn so it does not slip out.
- Rolling pin: possible, but the most demanding option. For hand rolling, I recommend 00 pasta flour; all-purpose dough is much harder to get sufficiently thin.
Before rolling, prepare somewhere to put the finished sheets. There are few things more annoying than making a beautiful sheet of pasta and immediately gluing it to the counter.
I like semolina for dusting the surface where the sheets will rest. You can also use the same flour you used in the dough.
For rolling itself, use all-purpose or 00 flour, not semolina. Be generous enough to prevent sticking. Semolina is useful for holding and separating the pasta, not for working it through the rollers.
How to Roll Egg Pasta with a Machine
1. Divide and Flatten
Cut the rested dough into four pieces. Work with one piece at a time, keeping the others tightly wrapped so they do not dry out.
Flatten the first piece with your hands or a rolling pin until it is roughly pancake thickness. Flour it and pass it through the machine’s widest setting.
2. Fold to Establish the Shape
Fold the sheet into thirds, like a letter. Flatten it, flour it again, and pass it through the widest setting once more.
Repeat this process about four times, aiming for something close to a rectangle. You are still on the widest setting. This is the shaping stage, not the thinning stage.
If folding in half will give you a better rectangle than folding in thirds, do that. The fold is a tool, not a religious obligation.
3. Thin Gradually
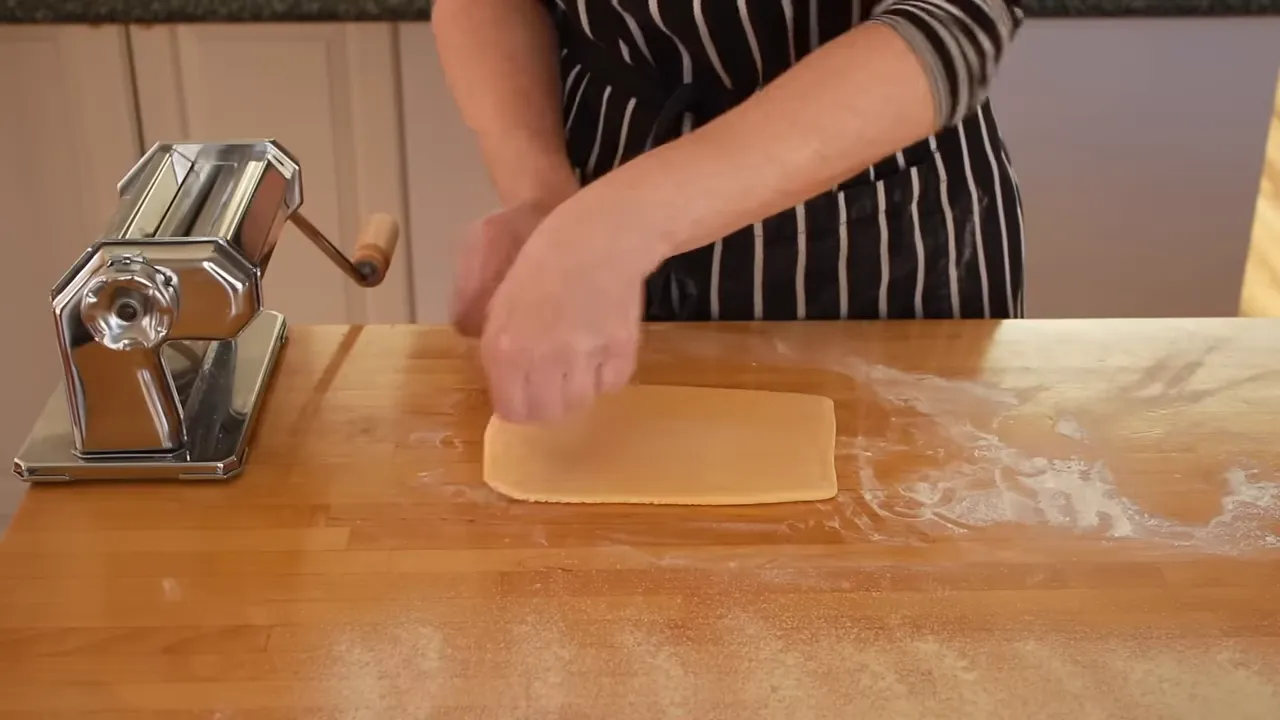
Once the shape is reasonably even, move through the settings one at a time. Do not jump straight from the widest opening to a very thin setting.
I generally pass the dough through each setting twice because it shrinks a little after the first pass. Add flour whenever the surface feels at all sticky.
As soon as the rollers catch the dough, release the incoming sheet. This frees your hand to catch it underneath and lets the dough drape over the back of the rollers, helping it stretch.
After the fourth or fifth setting, the sheet may become awkwardly long. Cut it in half and continue with shorter pieces.
4. Stop at the Right Thickness
On the machines I use, I generally stop at setting 6 for filled pasta and most ribbons. Unlike the earlier settings, I use setting 6 only once; a second pass makes the sheet thinner than I want.
For heartier ribbons, I sometimes stop at setting 5, passing the dough through three times and gently stretching it as it emerges. That produces something between an ordinary setting-5 sheet and the thinner setting-6 sheet.
These numbers describe my equipment. The important goal is a very thin, supple sheet, not a particular number on every machine.
With a KitchenAid attachment, use the mixer’s lowest speed. Carry delicate sheets over the backs of your hands rather than pinching them with your fingers.
How to Roll Pasta with a Rolling Pin
If you are rolling by hand, flour the counter generously and roll from the center outward.
- Roll until the dough becomes elongated in one direction.
- Rotate it 90 degrees.
- Continue rolling from the center toward the edges.
- Lift and flour as needed to prevent sticking.
- Repeat until the sheet is genuinely thin.
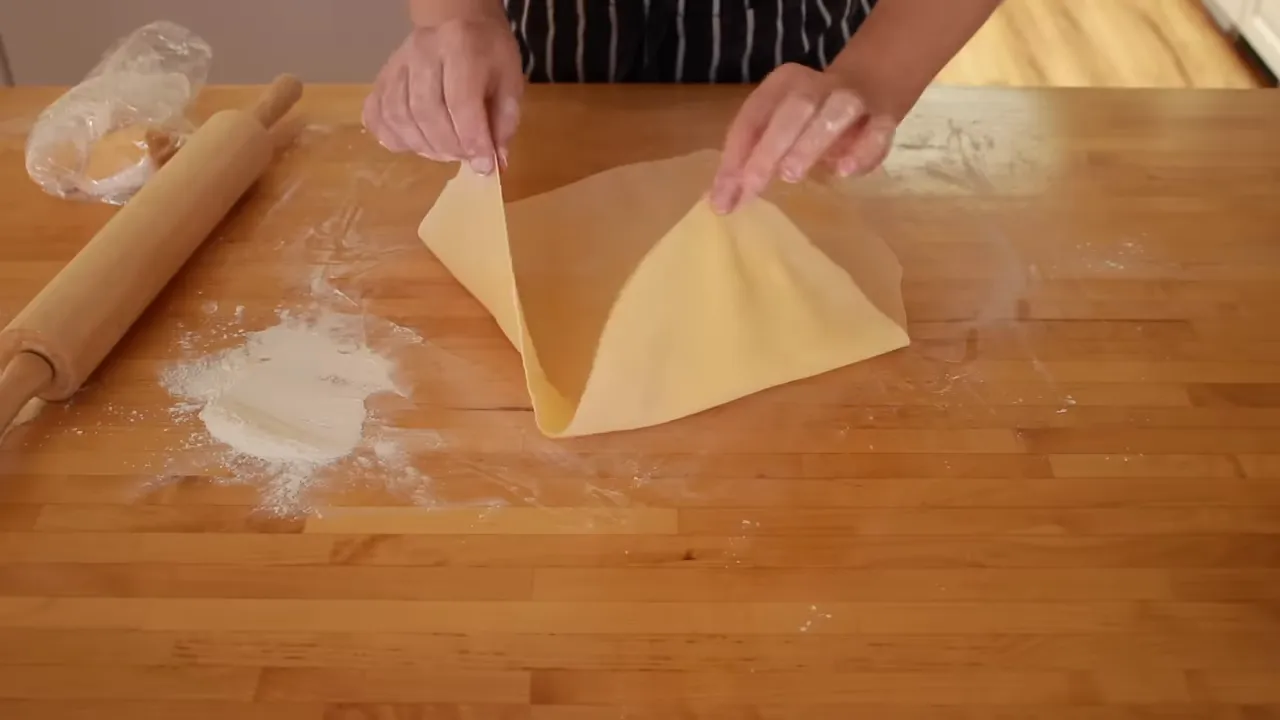
You will probably reach a point where you think it is thin enough. Keep going. It probably is not.
The target is barely thicker than phyllo dough: light, supple, and almost fabric-like. Think of the fabric you would want to wear on a brutally hot, humid summer day.
This Dough Is Not for Thick Hand-Shaped Pasta
It is tempting to skip rolling and turn the dough into orecchiette or cavatelli. I would not use this dough for those shapes.
Eggs produce a firmer, chewier pasta, which is lovely when the dough is thin. In thick rustic shapes, that same firmness becomes a liability.
Water-based pasta dough produces a softer result and is better suited to those thicker shapes. My hand-shaped pasta lesson covers shapes designed for that dough.
Dry, Store, and Cut the Sheets
For Filled Pasta, Work Immediately
If you are making ravioli or another filled shape, fill the sheets while they are still slightly tacky. Do not deliberately dry them first.
For Ribbons, Dry Until Leathery
For ribbon pasta, let the sheets dry until they feel like soft leather: still pliable, but no longer sticky.
When the first side feels dry enough, flip the sheet and dry the second side. This generally takes 15 to 30 minutes, depending on the room’s humidity. Use the texture, not just the clock.
To Make the Pasta Ahead
Once the sheets are slightly dry but still flexible, dust them with flour and stack them between pieces of parchment paper. Wrap the stack tightly in plastic and refrigerate for 1 to 2 days.
I prefer storing sheets and cutting them shortly before cooking. This reduces the opportunity for cut ribbons to stick together.
Cut into Ribbons
- Dust the sheet with semolina, even if you have dried it somewhat. If it is still moist, be especially generous.
- Roll the sheet inward from both ends toward the center, leaving a meeting point between the two rolls.
- On a cutting board, slice across the rolls with a chef’s knife to your preferred ribbon width.
- Slide the dull spine of the knife into the center crease and lift to unfurl the ribbons.
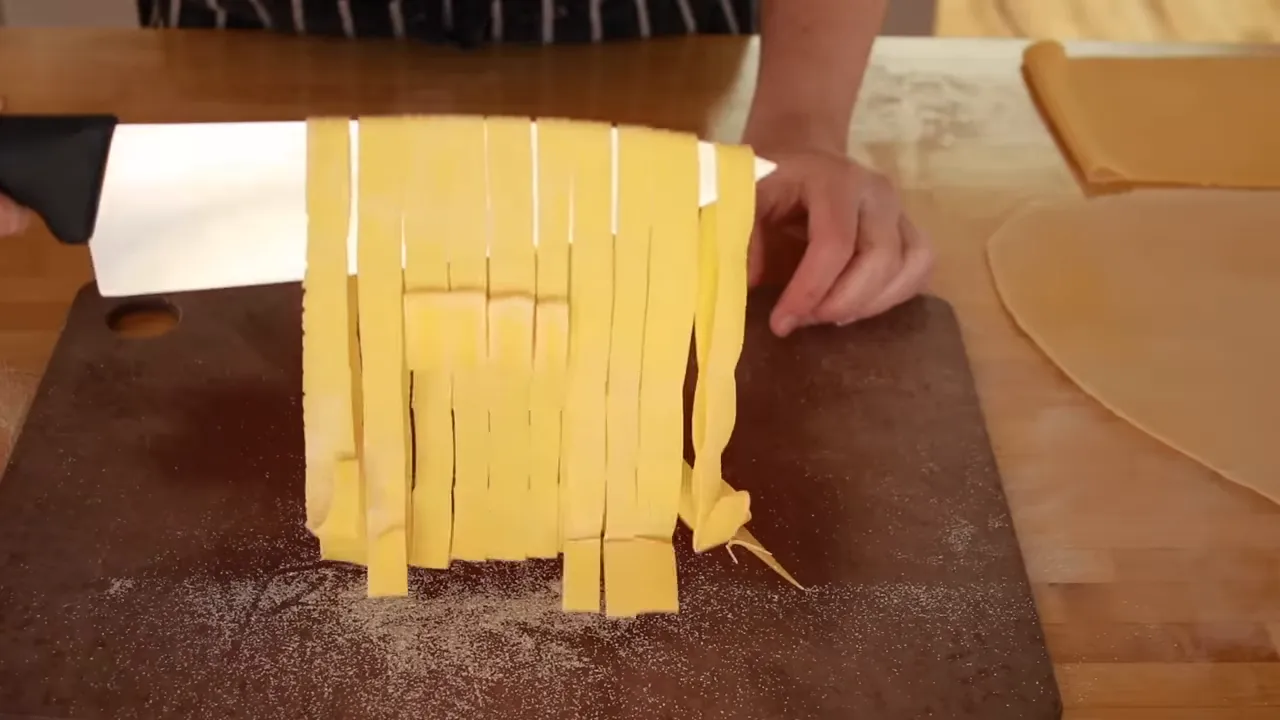
Cut very long sheets into shorter lengths before rolling and slicing. For slightly thicker pasta, I like narrower ribbons. Experiment with thickness and width until you find the combination you enjoy.
How to Salt the Cooking Water
Fresh pasta cooks so quickly that it has much less time than dried pasta to absorb seasoning from the water. That is why the water needs more salt than you might expect.
“Salty like the sea” is not a particularly useful measurement unless you regularly drink seawater. Here is my starting point for this salted dough:
- Water: 6.5 quarts, approximately 6 liters.
- Salt: 65 g.
- If measuring by volume: approximately 1/2 cup Diamond Crystal kosher salt or 1/4 cup table salt.
Do not substitute kosher salts by volume without accounting for the brand. Morton’s kosher salt is much closer to table salt than to Diamond Crystal in how much salt fits into a measure. Weight is the dependable option.
This is my preferred seasoning level, not a commandment. Adjust for your taste and any sodium restrictions. These quantities also assume you salted the dough.
Cook Briefly, Lift Out, and Sauce Immediately
Have your sauce hot before the pasta enters the water. Fresh ribbons may be ready in about a minute. That is not enough time to start preparing their sauce.
- Heat the water with the pot covered to help it come up to temperature.
- When nearly boiling, remove the lid, add the measured salt, and bring to a full boil uncovered.
- Add the pasta, stir, and set a timer for 1 minute.
- Taste a ribbon to check doneness. Depending on thickness, it may need a little longer, but thin fresh pasta generally cooks in 1 to 2 minutes.
- Lift the pasta from the water and transfer it directly to the hot sauce.
- Toss with the sauce and a generous piece of butter, then serve promptly.
I add the salt near the end of heating so I can keep the lid on initially, then leave the pot uncovered as it reaches a boil. Keep an eye on the pot rather than leaving it covered and risking a boil-over.
Why I Do Not Use a Colander
The flour and semolina used to prevent sticking can settle toward the bottom of the pot. If you pour the entire pot through a colander, you send that sediment straight back over the pasta.
Instead, lift long ribbons out with tongs, then use a spider strainer to collect what remains. It holds plenty of pasta and drains efficiently, while leaving the floury sediment behind.
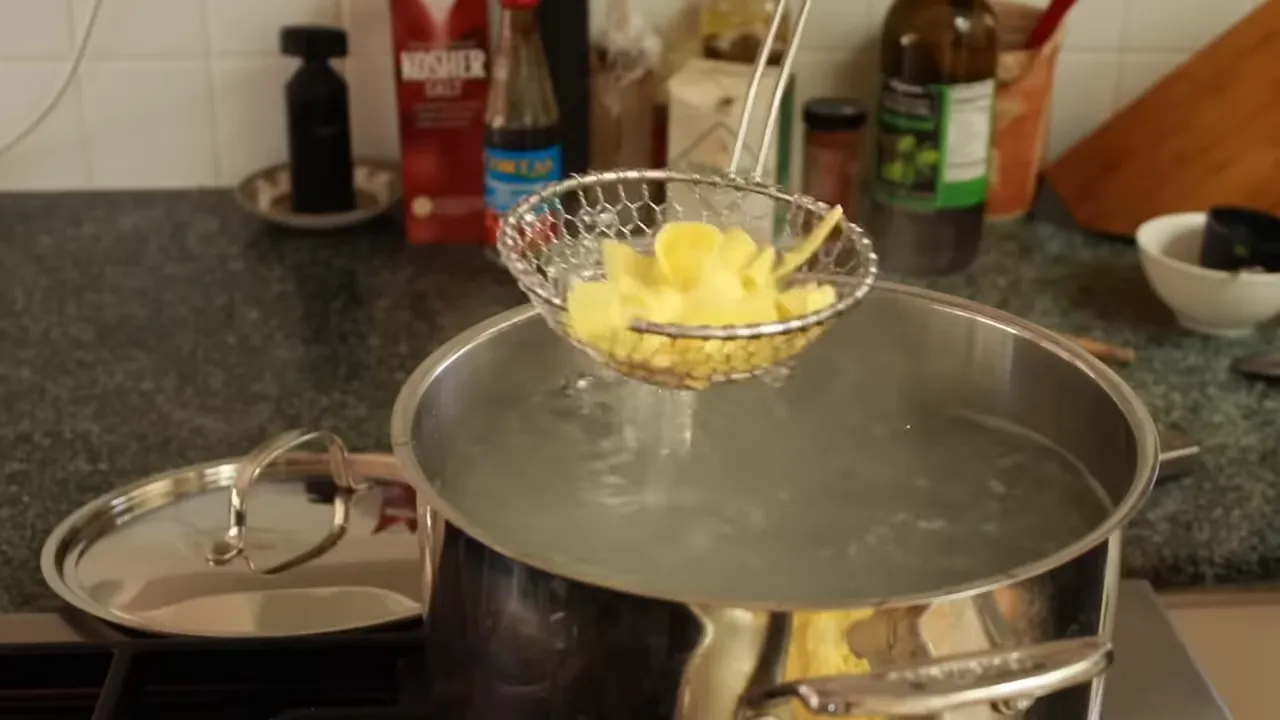
Transfer the pasta straight into the hot sauce. You have worked too hard on those beautiful sheets to let them sit around cooling while dinner gets organized.
Precision Creates Pasta Intuition
The most common fresh pasta problems are not mysterious: inconsistent measurements, insufficient kneading, sheets that are too thick, sticking, and inadequate seasoning.
Control those variables, and the process becomes much more predictable. Eventually, you will recognize the dough’s texture and make adjustments almost without thinking.
Years of weighing and timing have not destroyed my ability to make pasta by feel. They created it. Start with accuracy, and give your hands something reliable to learn.


